-
pxl 20250413 pxl 20250413
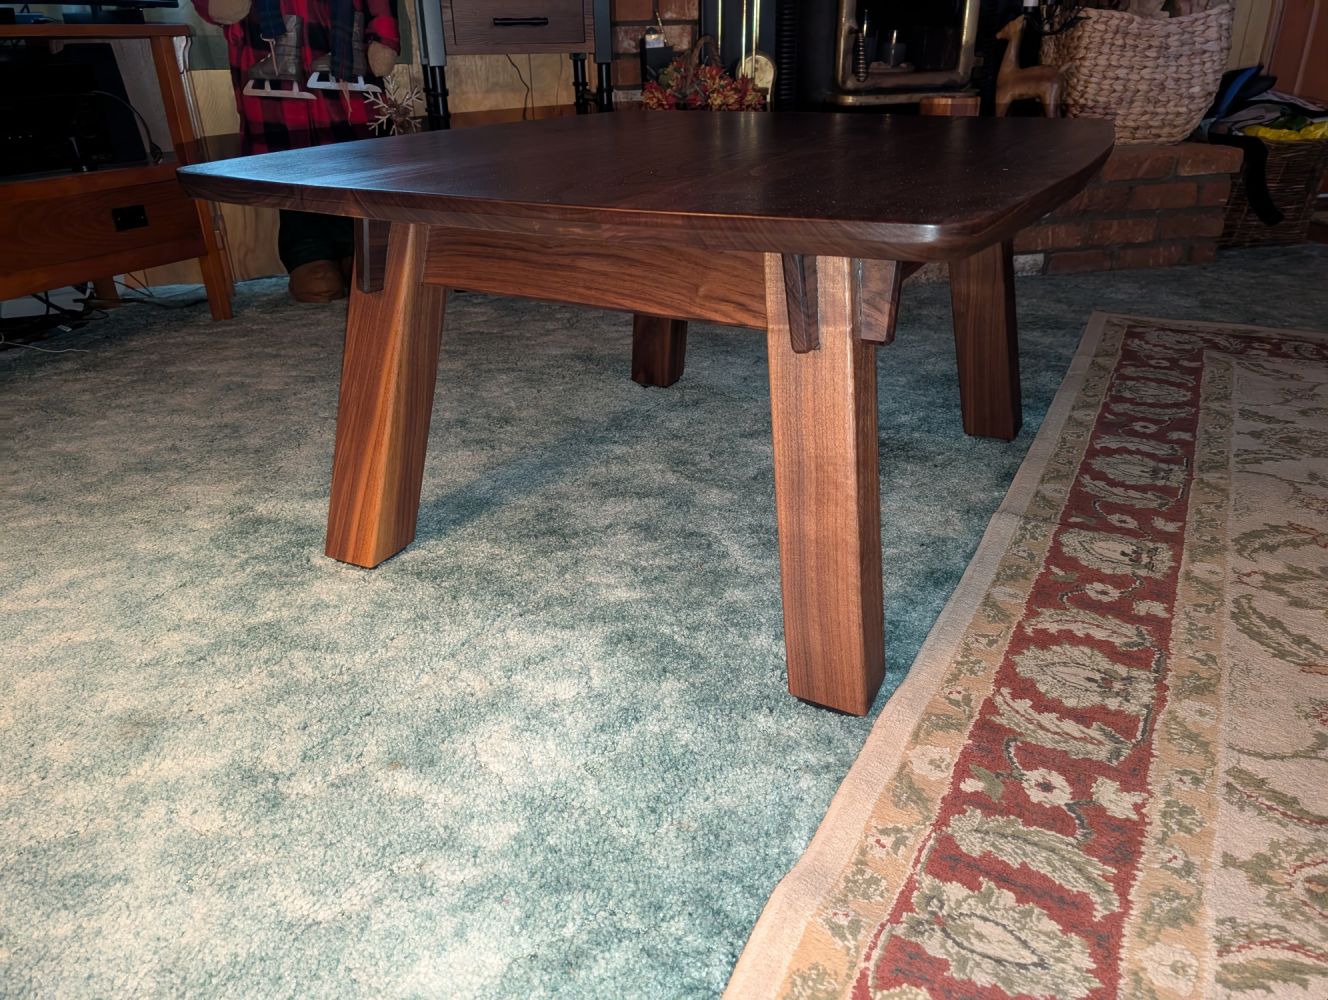
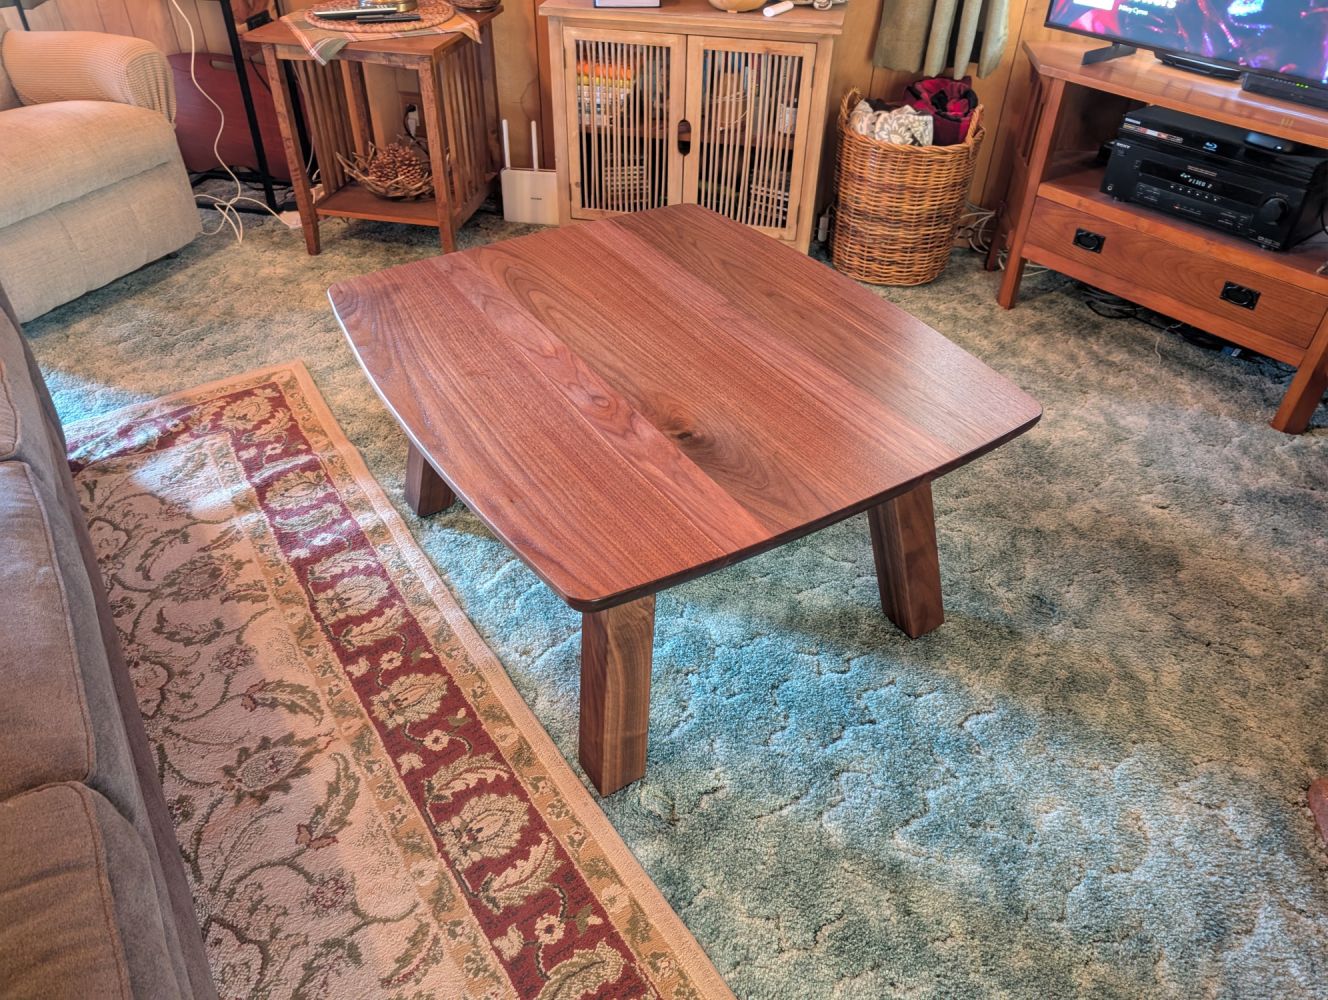
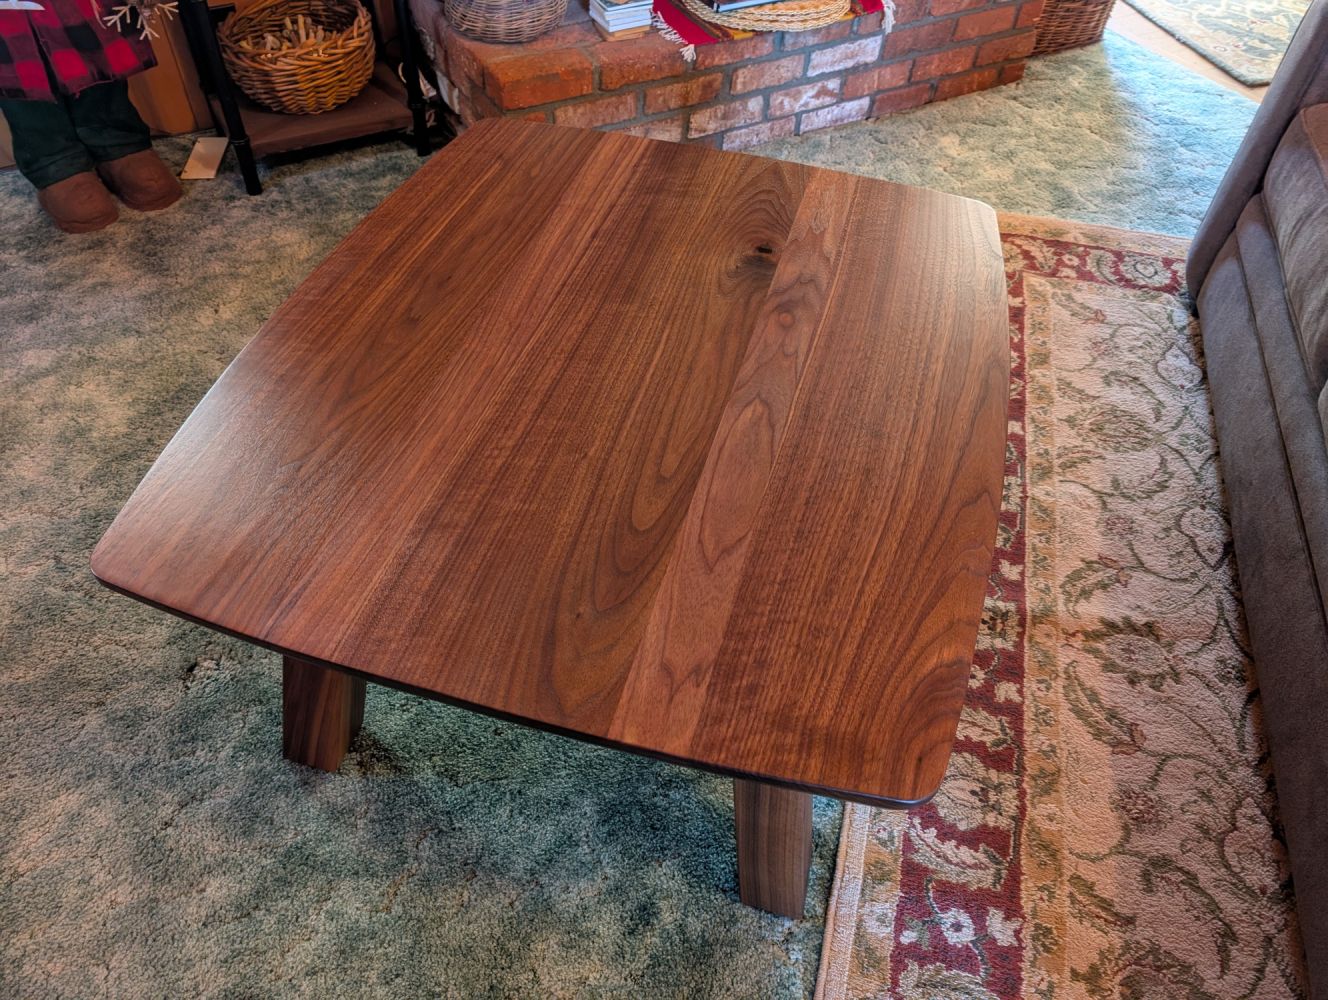
The finished coffee table is a bit of a stylistic mix: the top is a bit mid century modern while the legs are somewhat Greene & Greene. The build is solid walnut, finished in Rubio Monocoat Pure, and the top has an additional finish of Method Carbon's ceramic nano coat for additional protection. For this project, I didn't have any plans but just worked off the top of my head...
The finished coffee table is a bit of a stylistic mix: the top is a bit mid century modern while the legs are somewhat Greene & Greene. The build is solid walnut, finished in Rubio Monocoat Pure, and the top has an additional finish of Method Carbon's ceramic nano coat for additional protection. For this project, I didn't have any plans but just worked off the top of my head...
-
pxl 20250203.mp pxl 20250203.mp
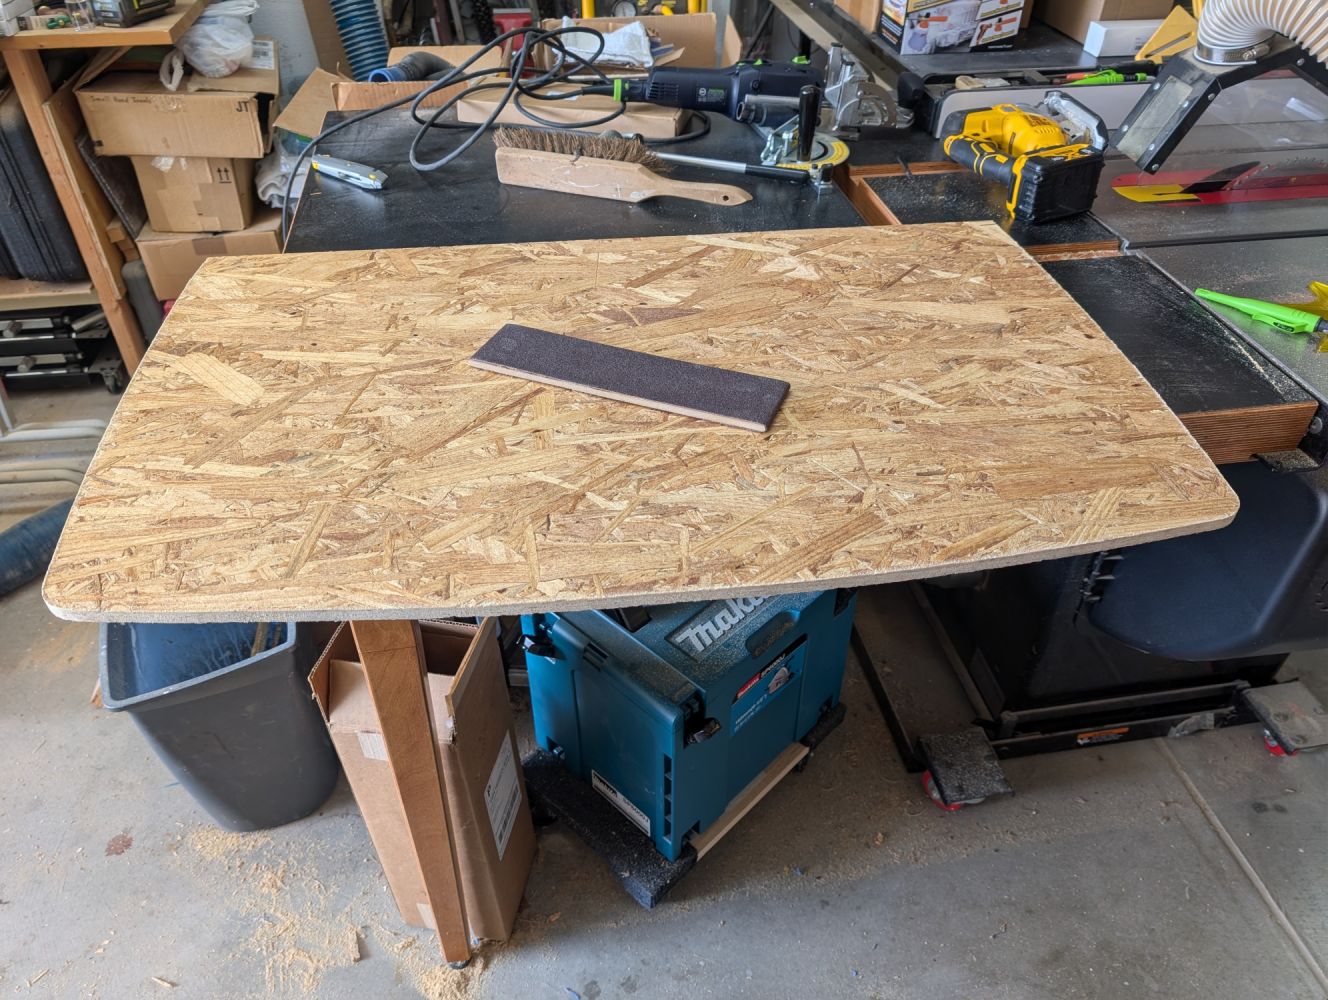
The first step was making a template for the top. I used some OSB to make a template for half the top. Using an aluminum straight edge with strings and clamps, I bent it to create a curve that was used for both the sides and ends, and a small can to round the corners. After drawing the lines, a saber saw was used to cut to the lines. Next was a belt sander to get down to the lines and finally hand sanding to smooth out the curves.
The first step was making a template for the top. I used some OSB to make a template for half the top. Using an aluminum straight edge with strings and clamps, I bent it to create a curve that was used for both the sides and ends, and a small can to round the corners. After drawing the lines, a saber saw was used to cut to the lines. Next was a belt sander to get down to the lines and finally hand sanding to smooth out the curves.
-
pxl 20250124.mp pxl 20250124.mp
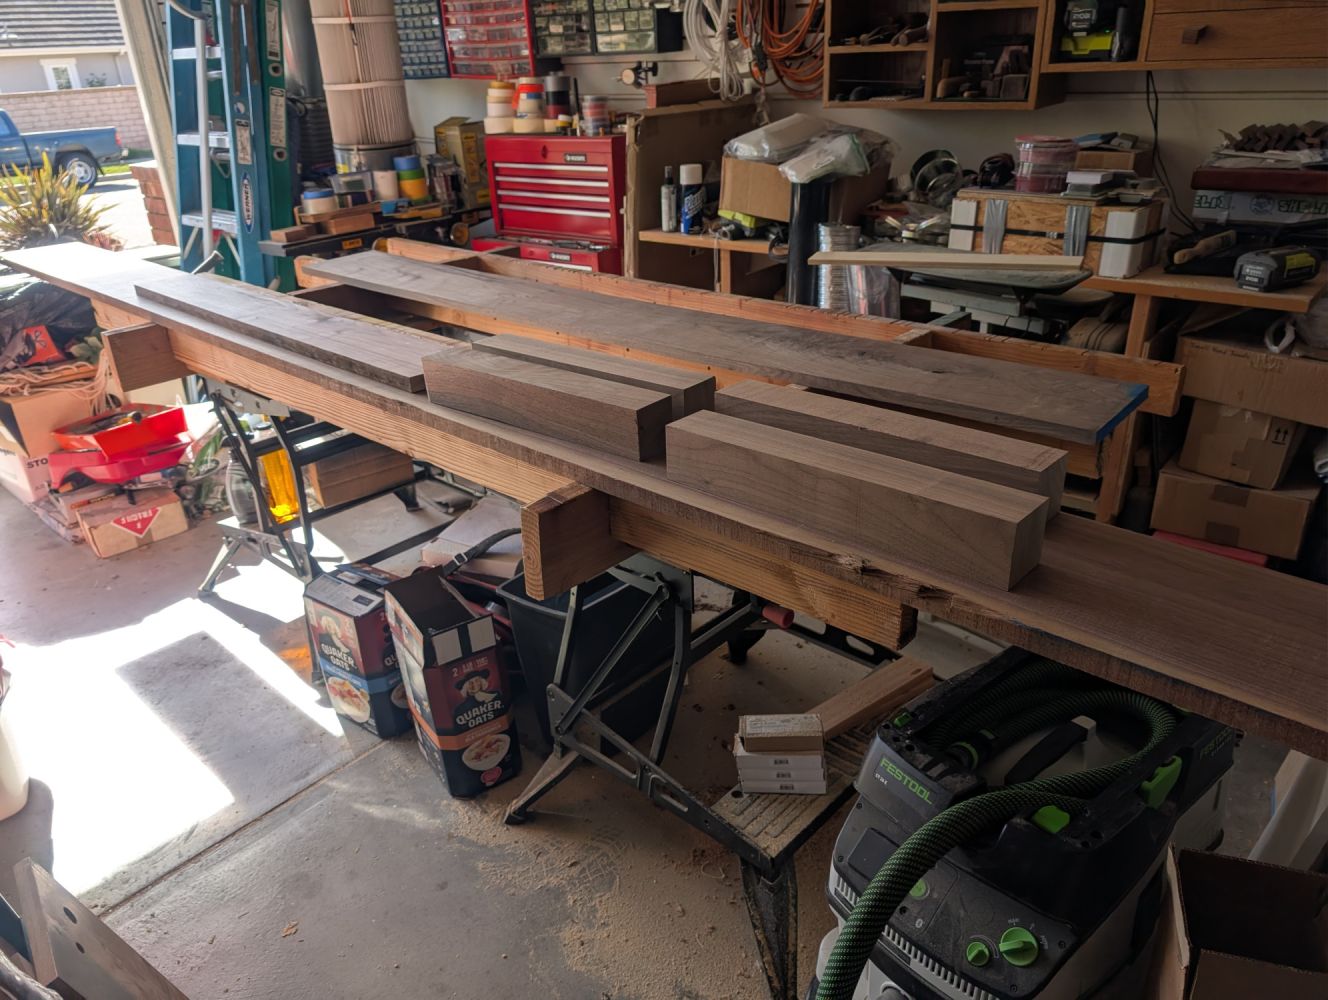
Just a quick shot of the lumber: 5/4, 4/4 walnut, along with some 3x3x18 walnut turning blanks.
Just a quick shot of the lumber: 5/4, 4/4 walnut, along with some 3x3x18 walnut turning blanks.
-
pxl 20250202.mp pxl 20250202.mp
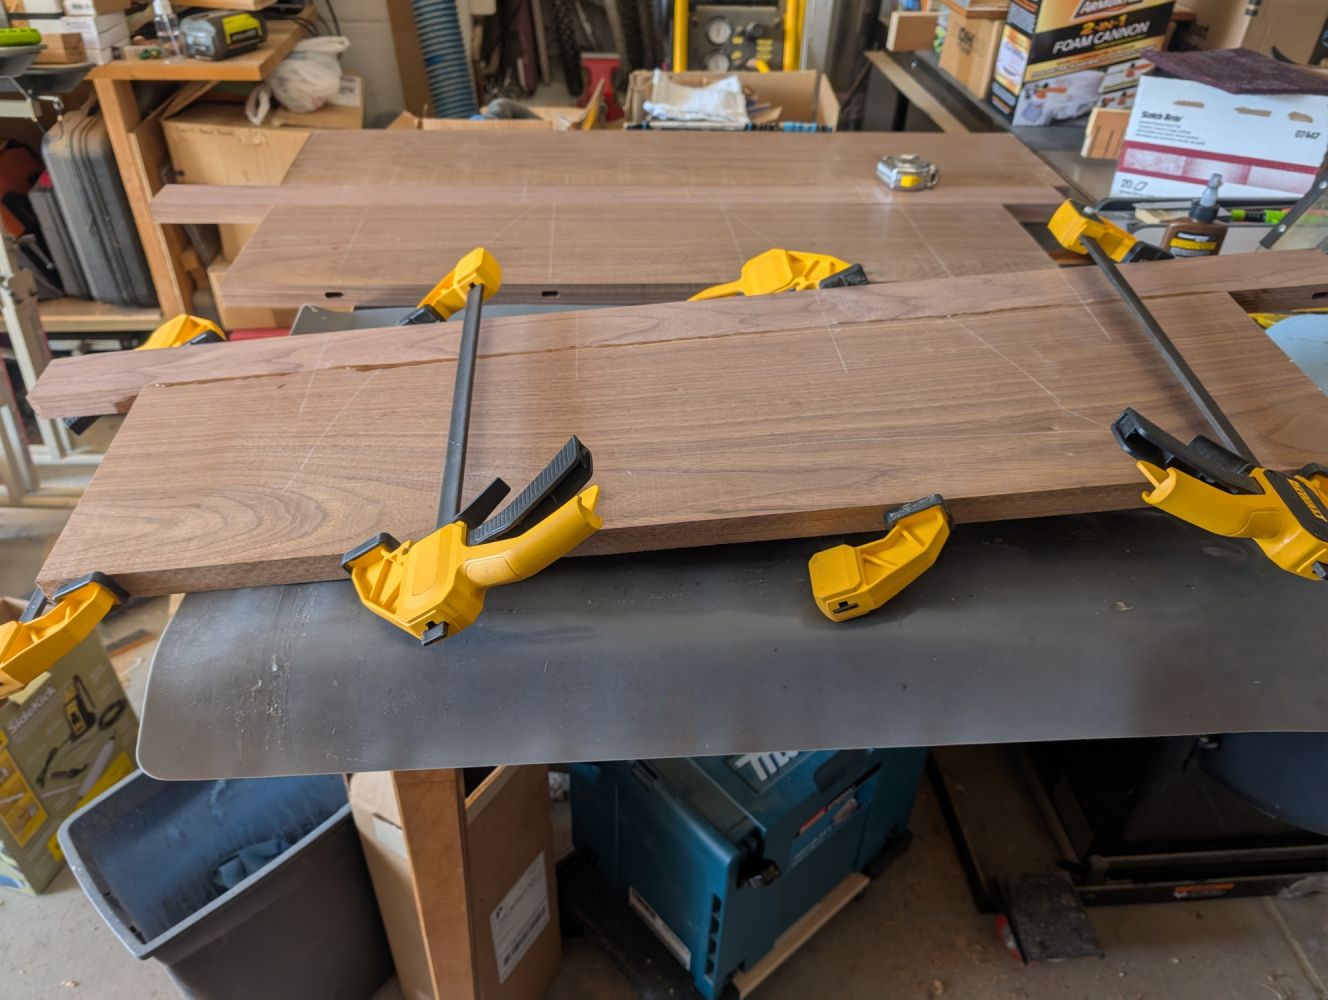
The top was glued up in two sections. Liquid hide glue was used for this project.
The top was glued up in two sections. Liquid hide glue was used for this project.
-
pxl 20250202.mp pxl 20250202.mp
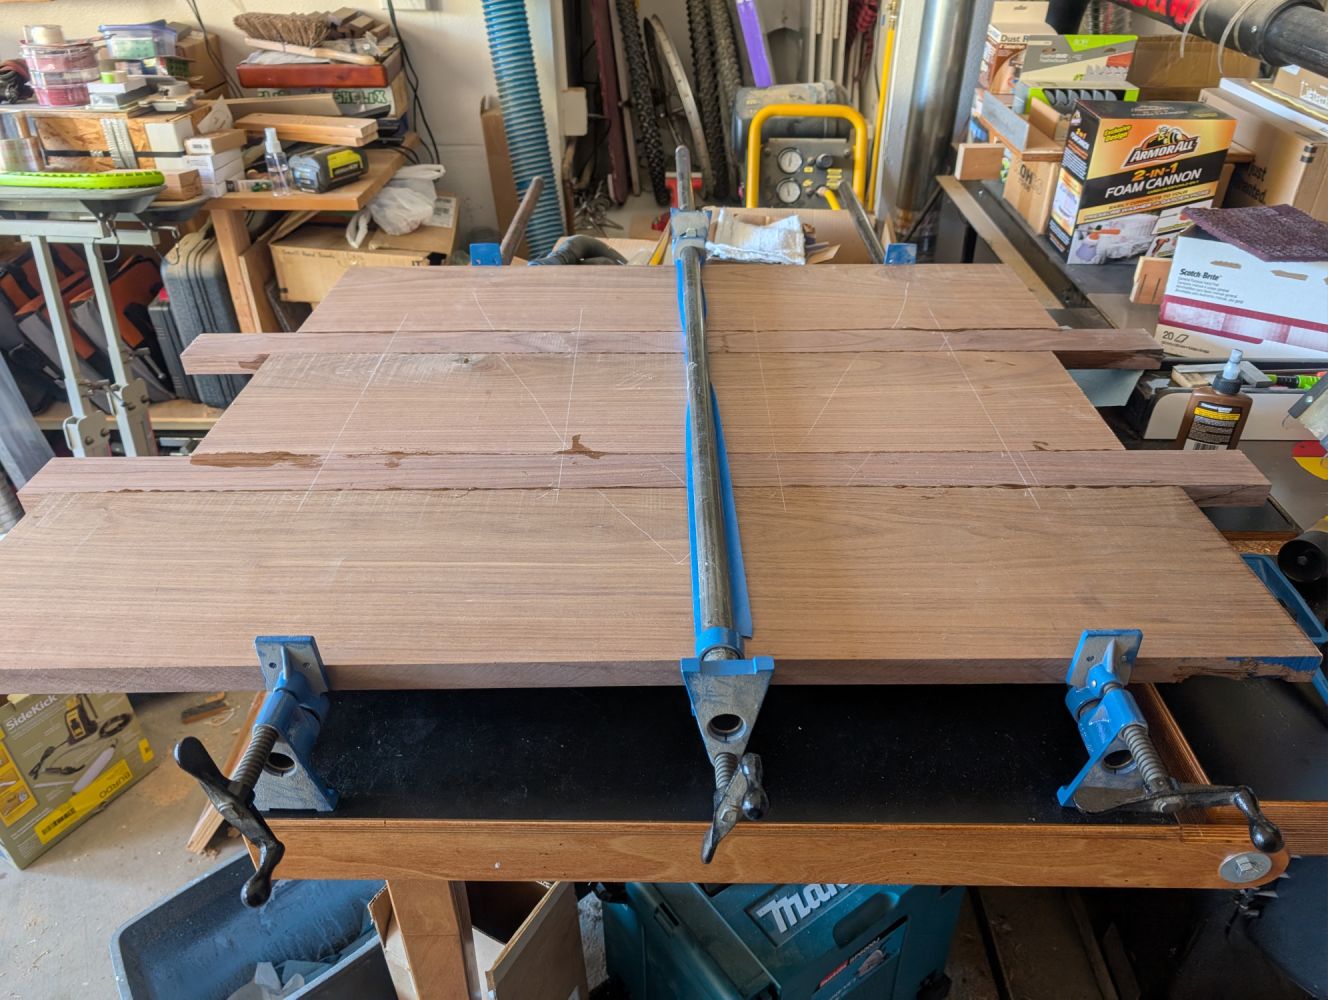
Gluing up the two sections together. Dominoes were used for aligning the boards.
Gluing up the two sections together. Dominoes were used for aligning the boards.
-
pxl 20250207.mp pxl 20250207.mp
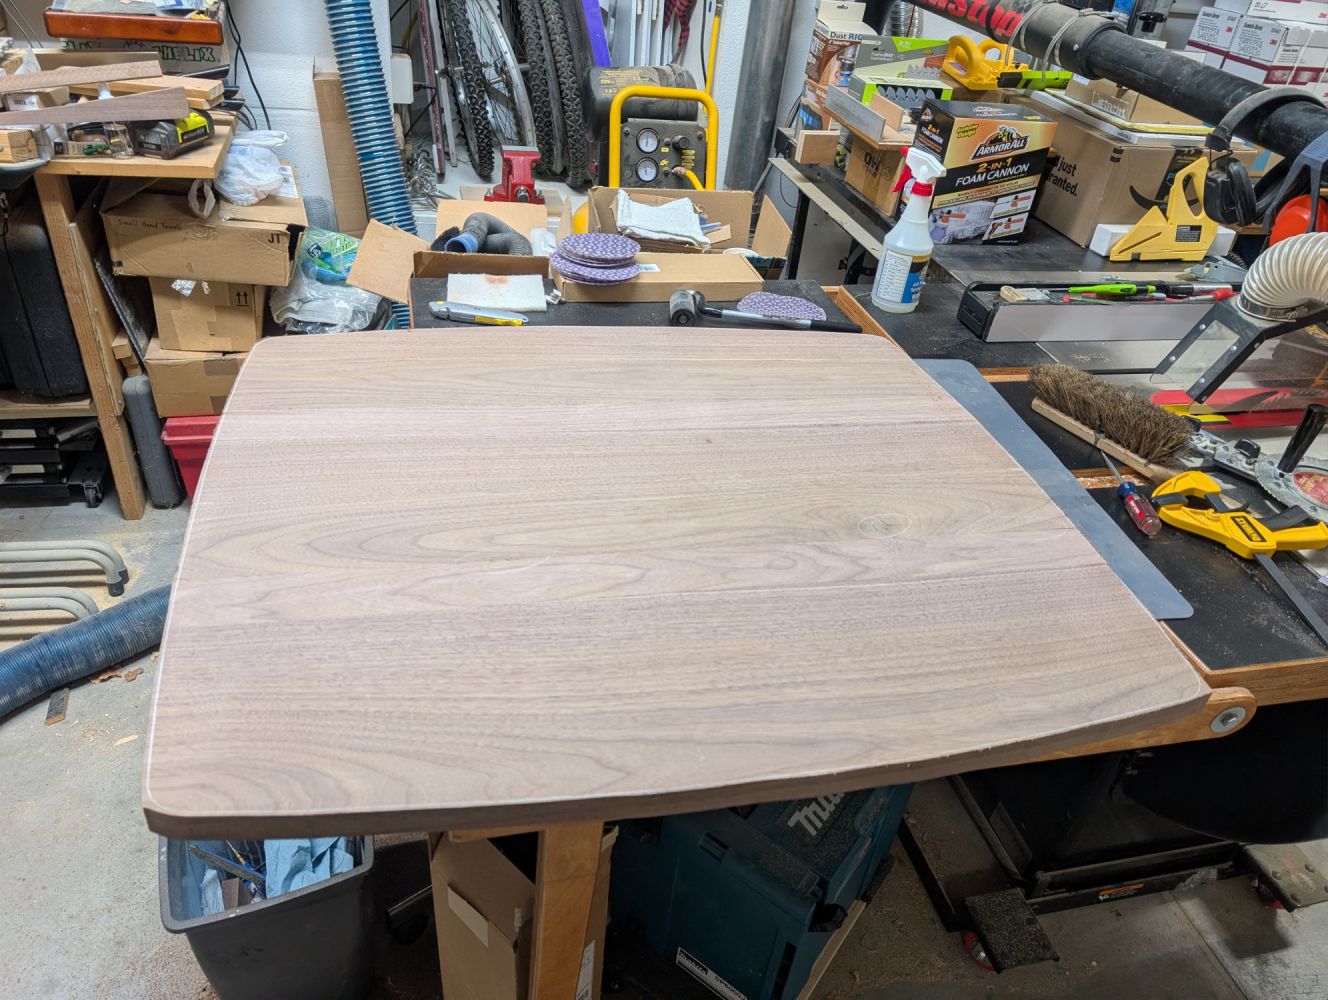
The template was used to draw a line, a saber saw to cut close to the line, and finally a router with a flush trim bit which followed the template to reach the final size of the table top. Some sanding smoothed out a few minor imperfections that I didn't notice in the template.
The template was used to draw a line, a saber saw to cut close to the line, and finally a router with a flush trim bit which followed the template to reach the final size of the table top. Some sanding smoothed out a few minor imperfections that I didn't notice in the template.
-
pxl 20250221.mp pxl 20250221.mp
The top after the first application of Rubio Mono coat. I've found that on walnut, two or three applications are necessary.
The top after the first application of Rubio Mono coat. I've found that on walnut, two or three applications are necessary.
-
pxl 20250411.mp pxl 20250411.mp
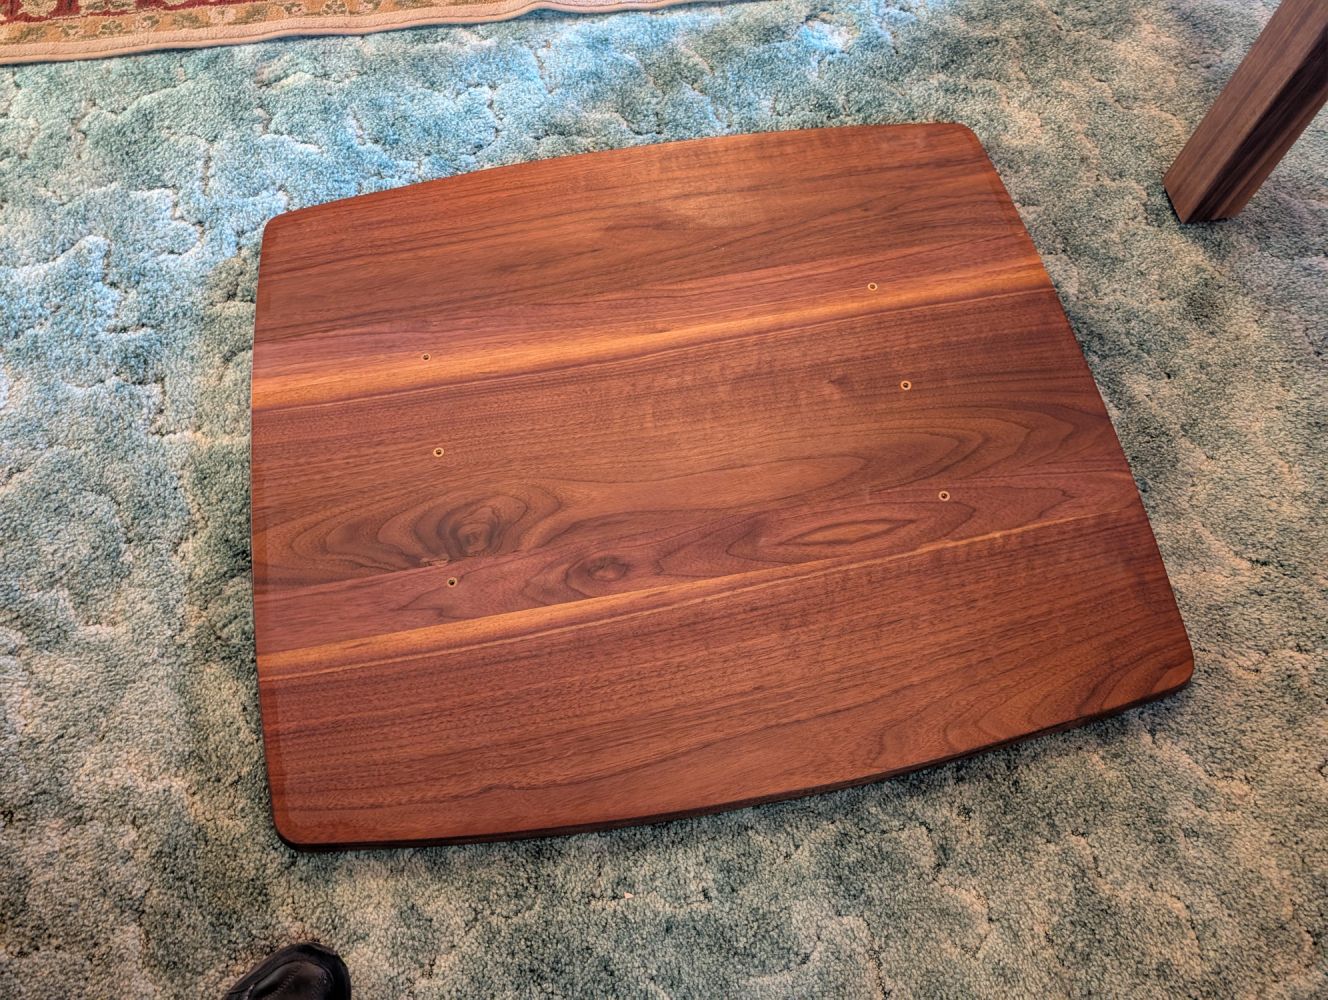
Six steel inserts, three at each end, in the underside will secure the top to the bask. The center insert will mate to a standard size hole for its brass screw, while the two outer screws will fit into slots in case humidity changes cause and width changes in the top.
Six steel inserts, three at each end, in the underside will secure the top to the bask. The center insert will mate to a standard size hole for its brass screw, while the two outer screws will fit into slots in case humidity changes cause and width changes in the top.
-
pxl 20250401.mp pxl 20250401.mp
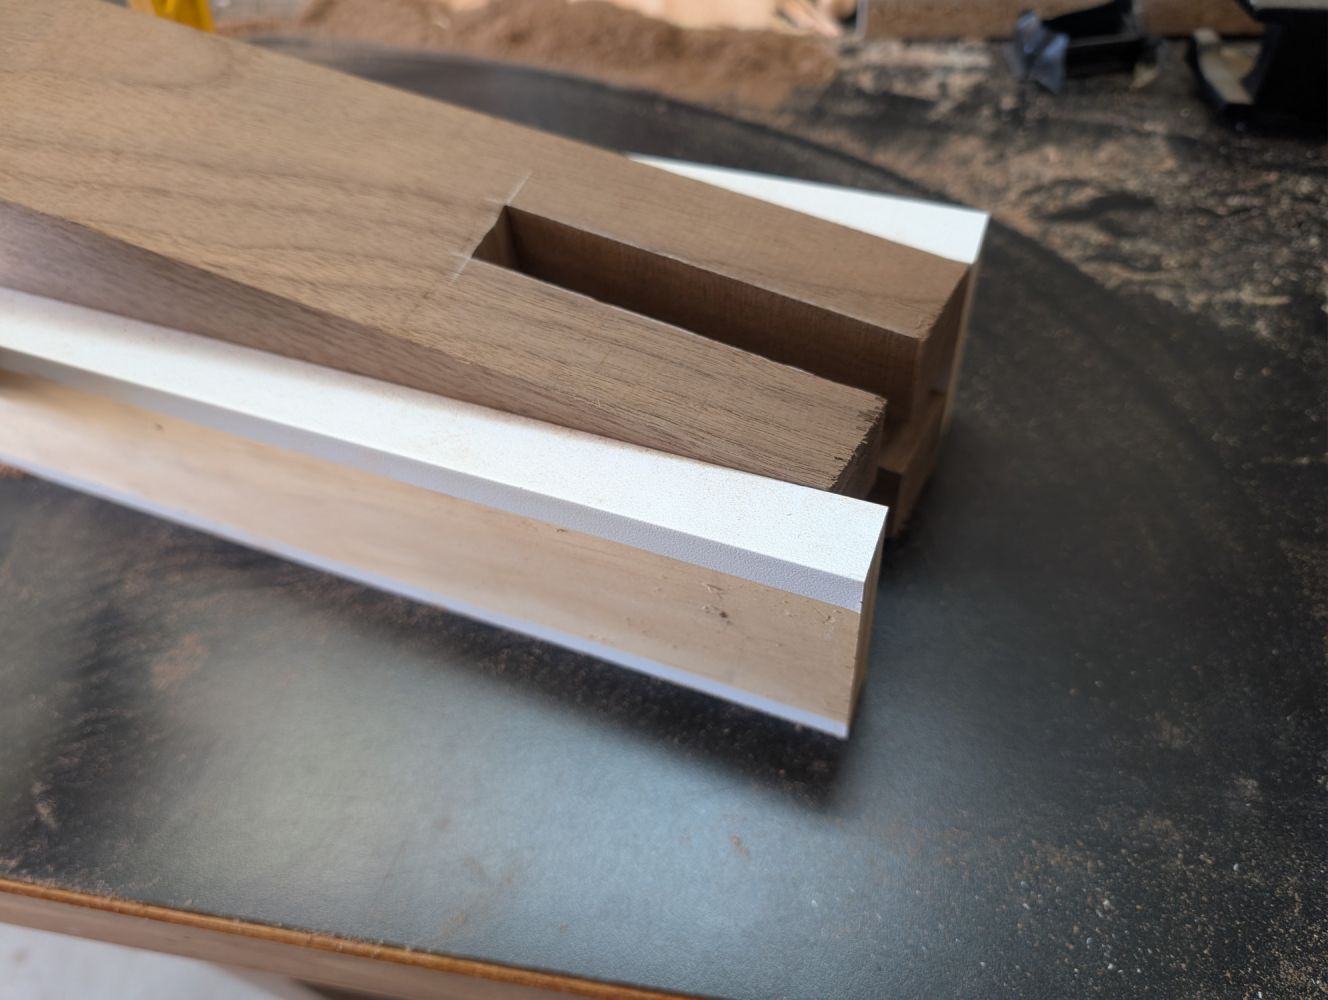
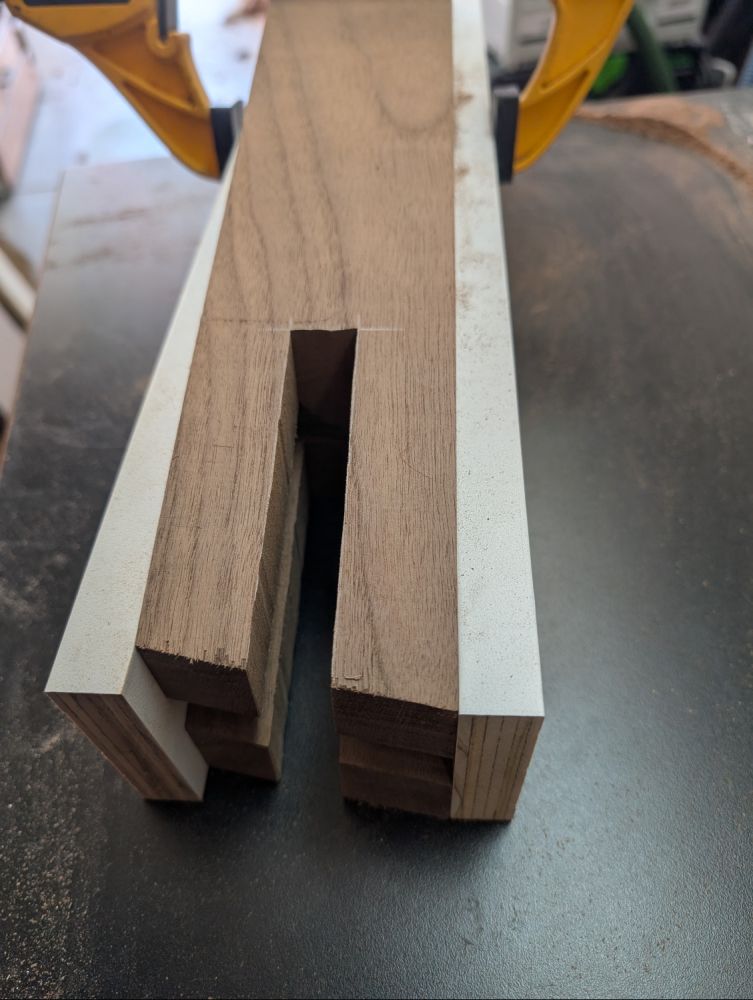
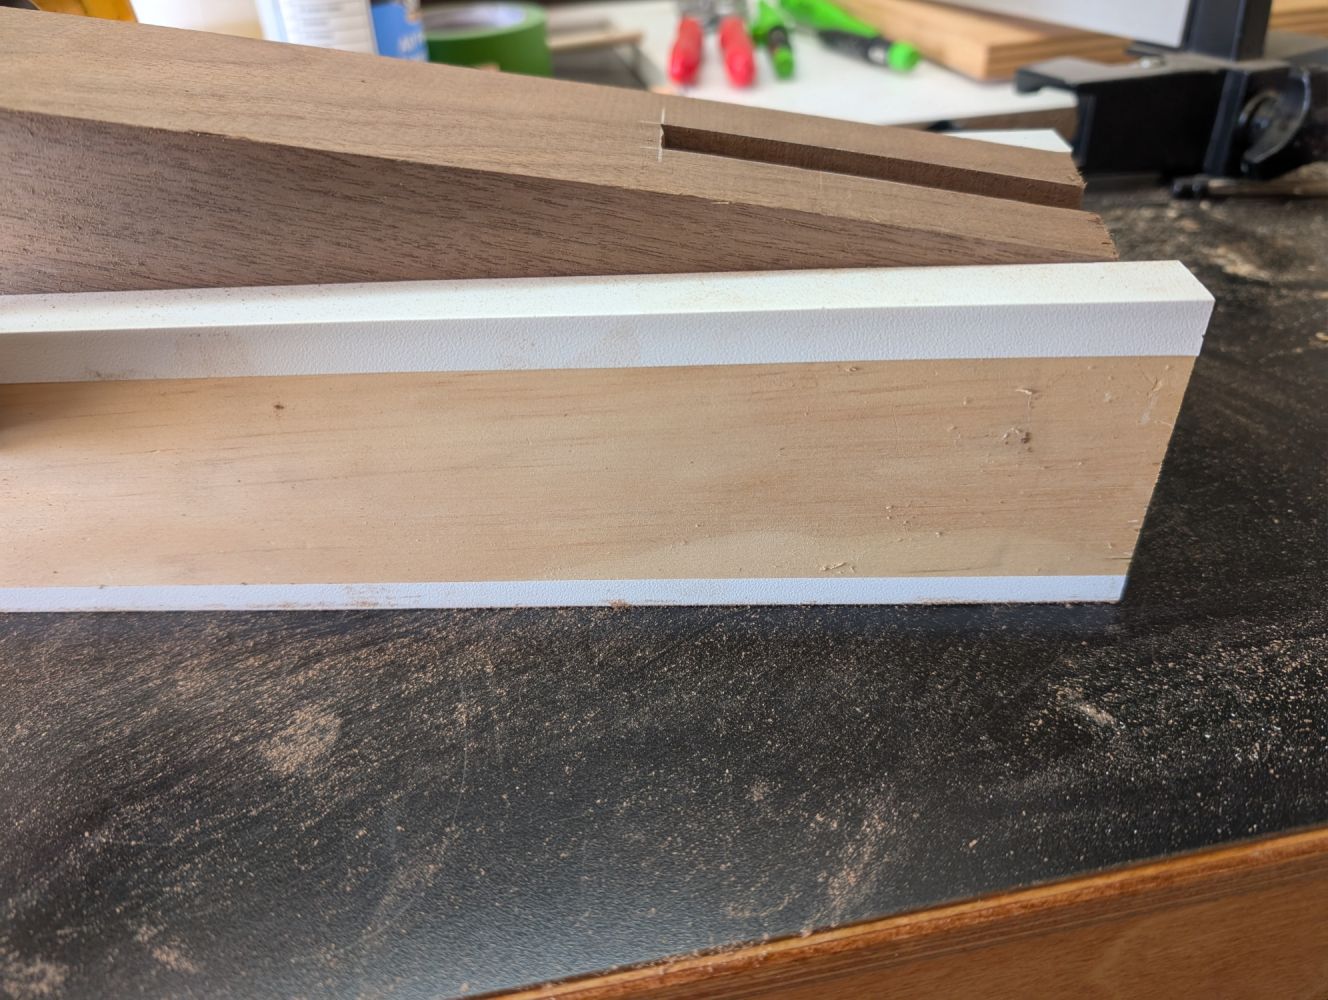
Since I was using slanted legs, with a castle joint, I made a quick jig to hold the legs while cutting the slots on a band saw.
Since I was using slanted legs, with a castle joint, I made a quick jig to hold the legs while cutting the slots on a band saw.
-
pxl 20250401.mp
pxl 20250401.mp
-
pxl 20250401.mp
pxl 20250401.mp
-
pxl 20250403.mp pxl 20250403.mp
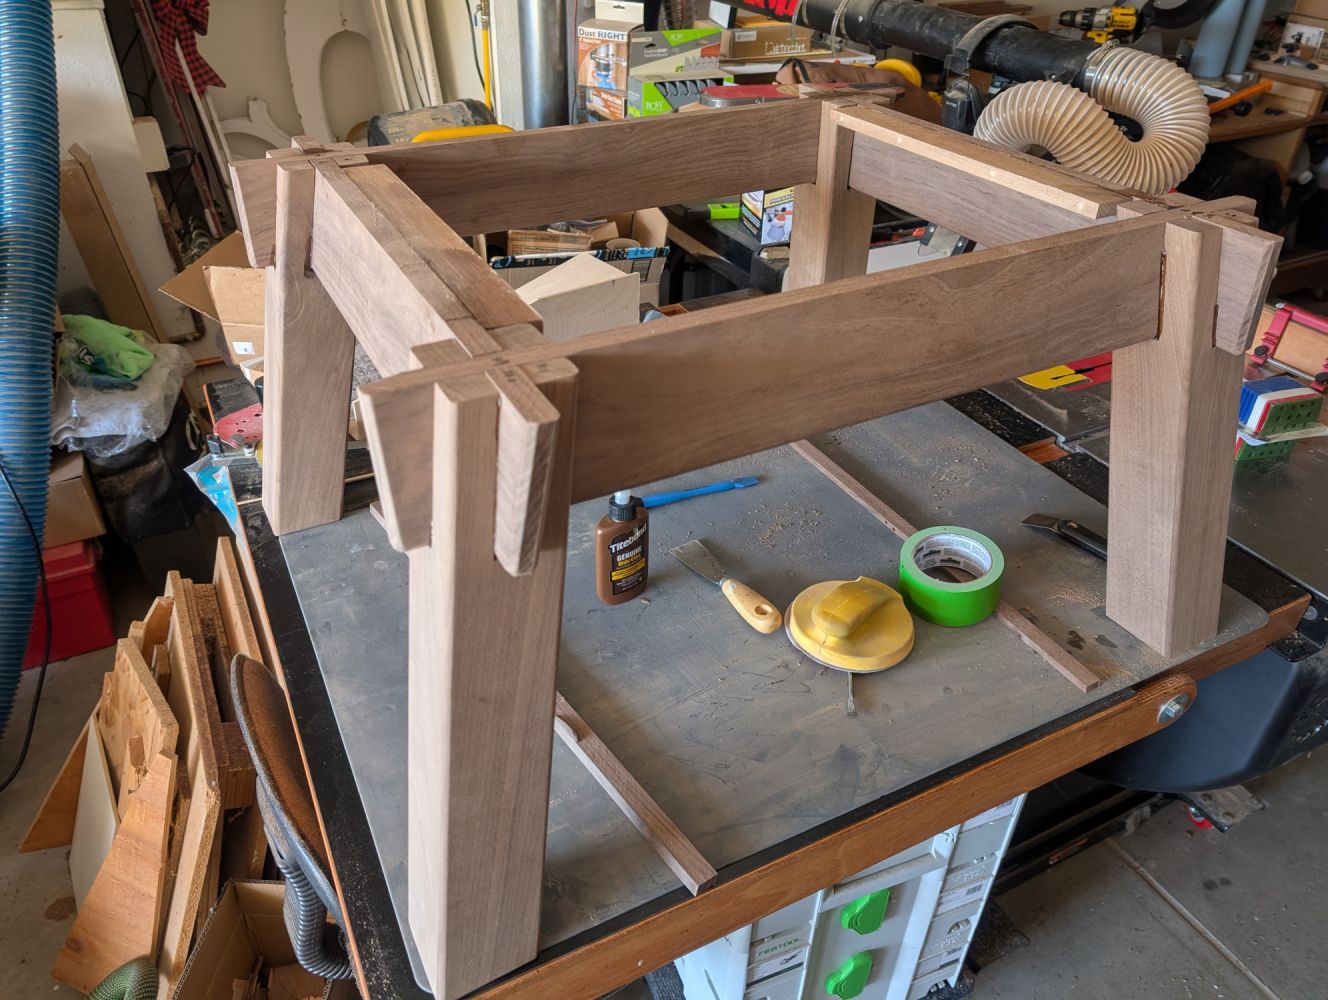
Dry fitting the rails.
Dry fitting the rails.
-
pxl 20250406.mp pxl 20250406.mp
Dry fitting the legs.
Dry fitting the legs.
-
pxl 20250406.mp
pxl 20250406.mp
-
pxl 20250406.mp pxl 20250406.mp
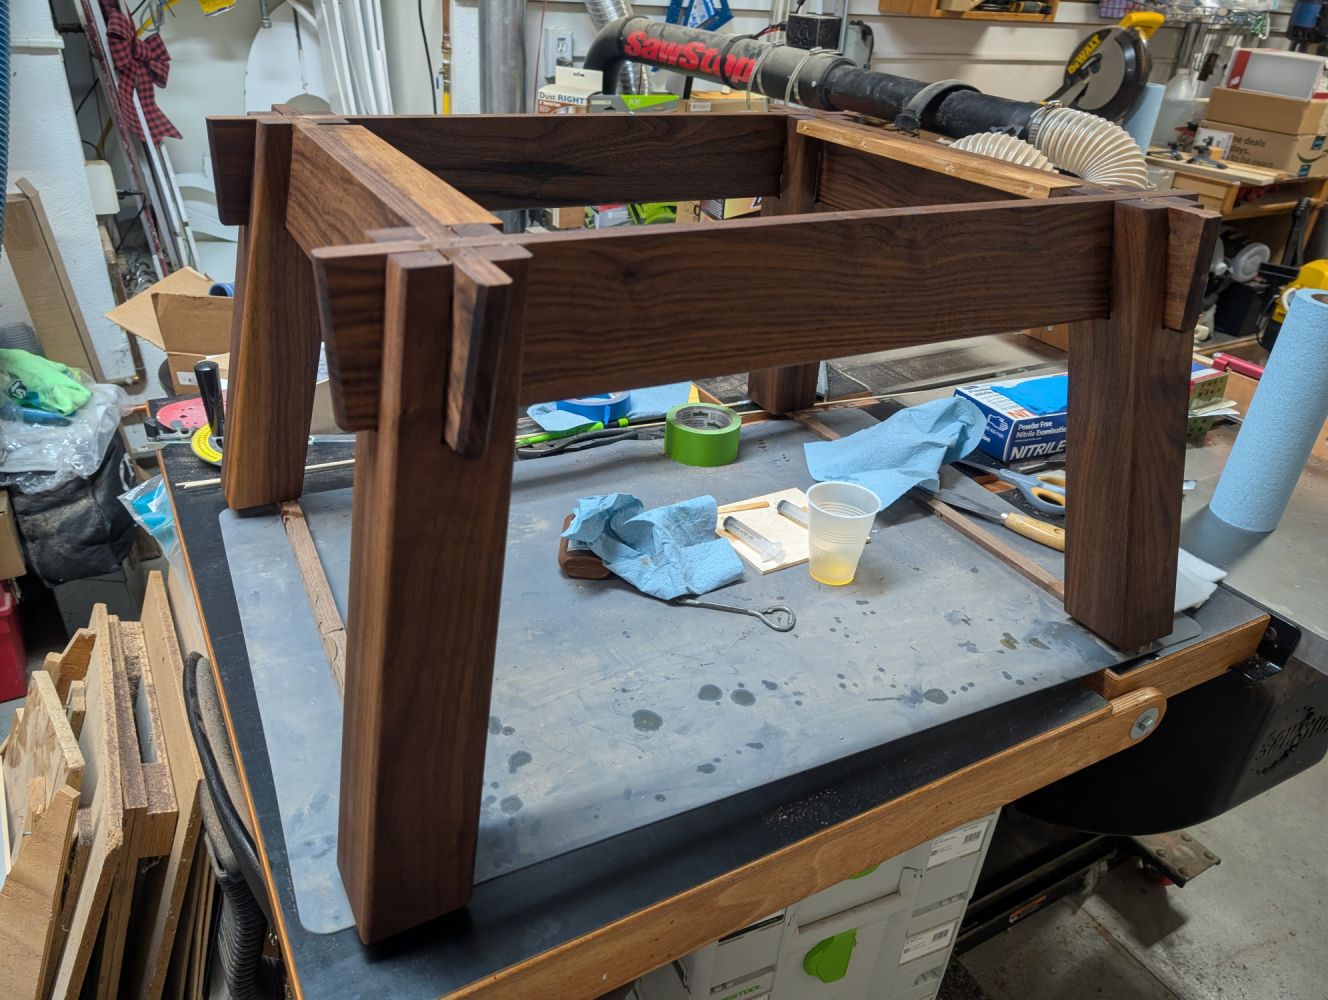
Legs and rails now glued, and Rubio applied.
Legs and rails now glued, and Rubio applied.
-
pxl 20250408.mp
pxl 20250408.mp
-
pxl 20250408.mp pxl 20250408.mp
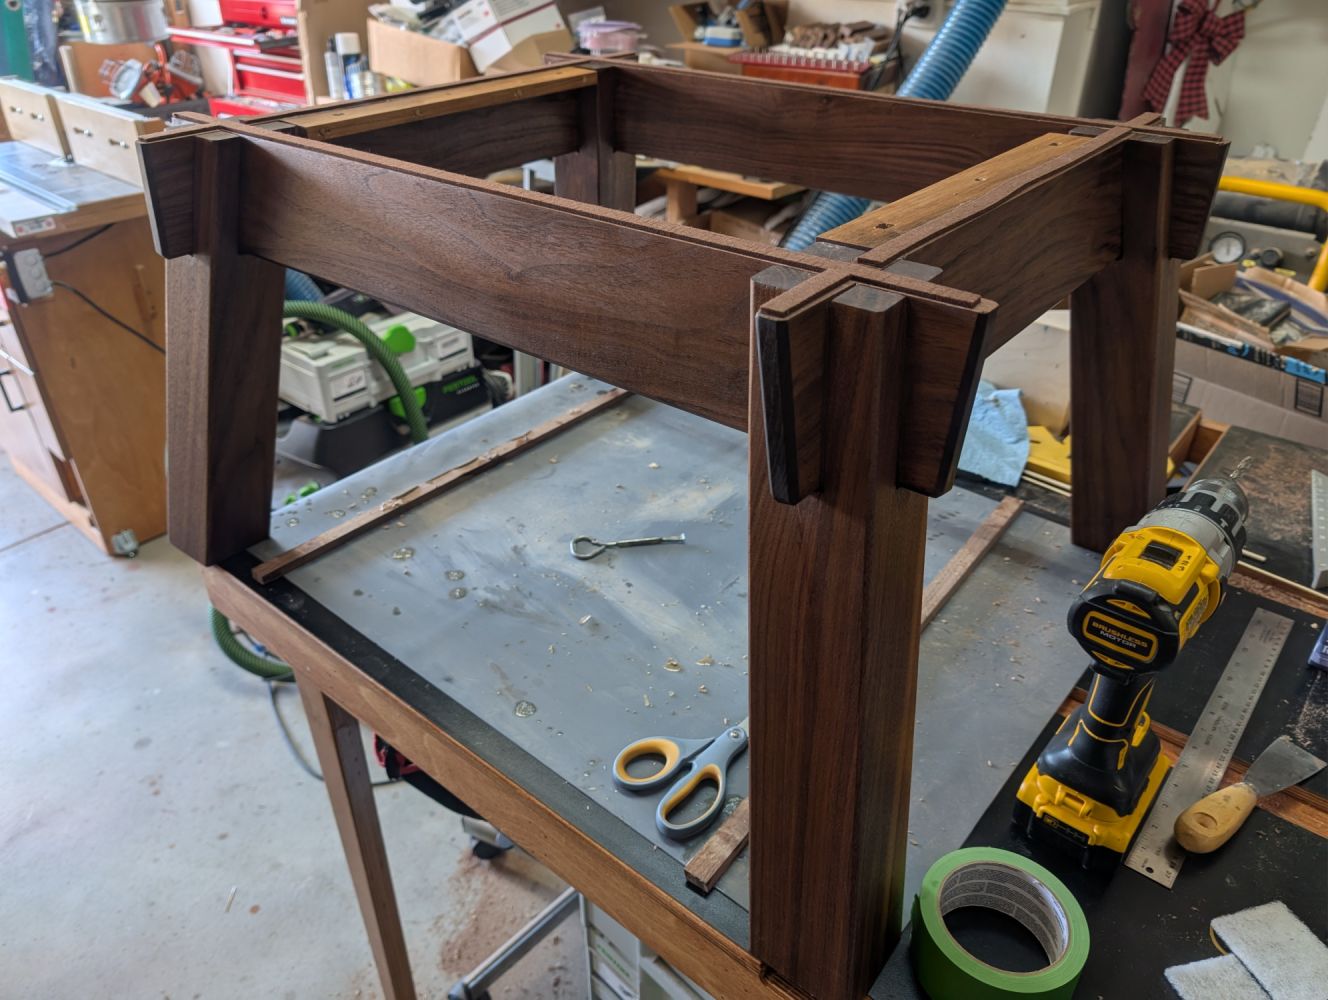
Just a view that helps to show the angle of the legs which is about 10 degrees.
Just a view that helps to show the angle of the legs which is about 10 degrees.
-
pxl 20250408.mp pxl 20250408.mp
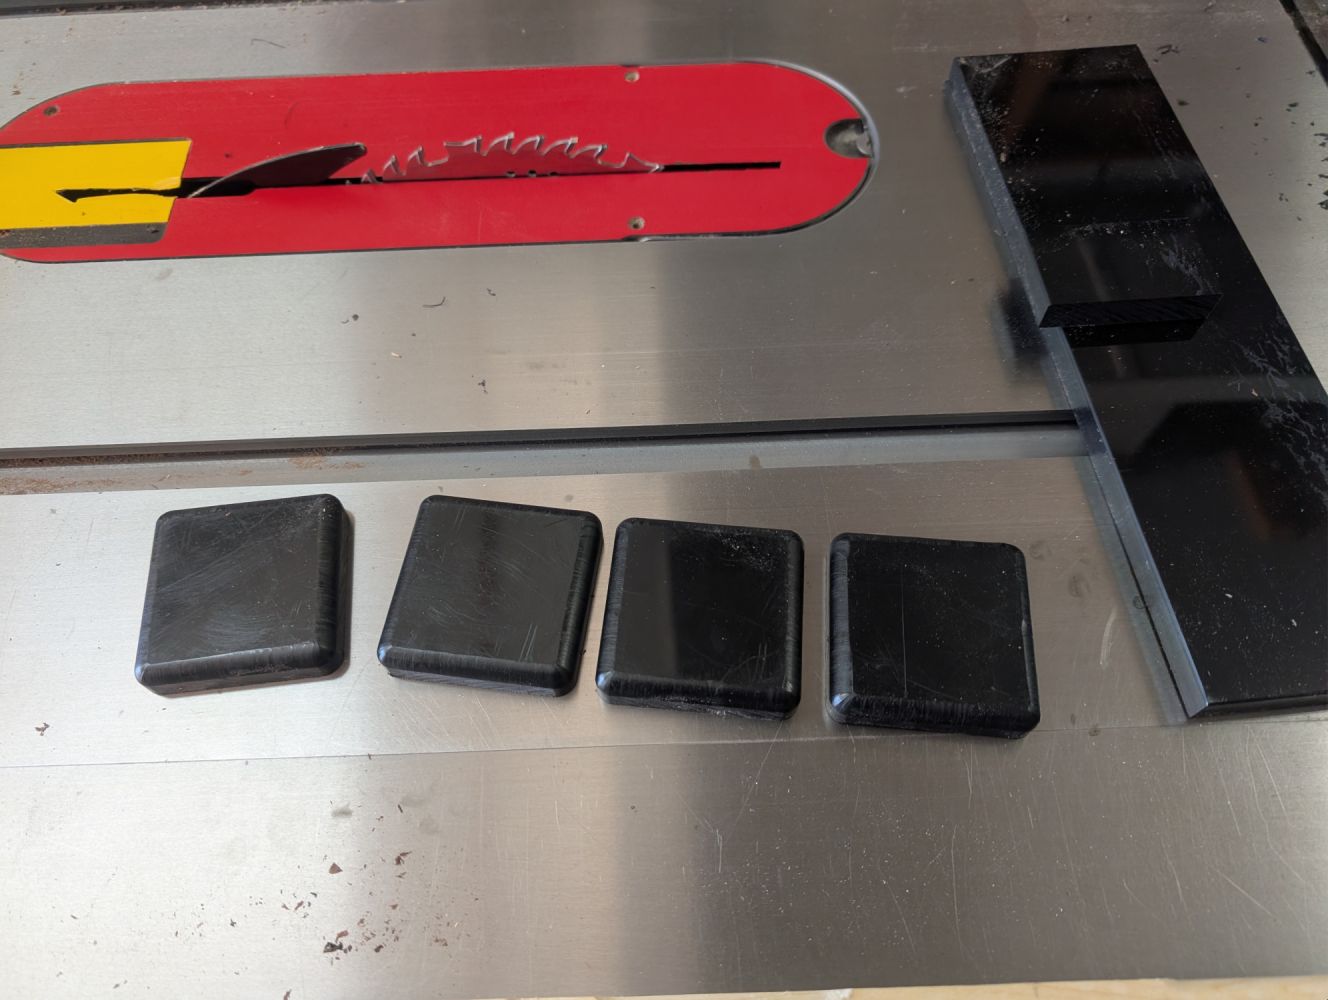
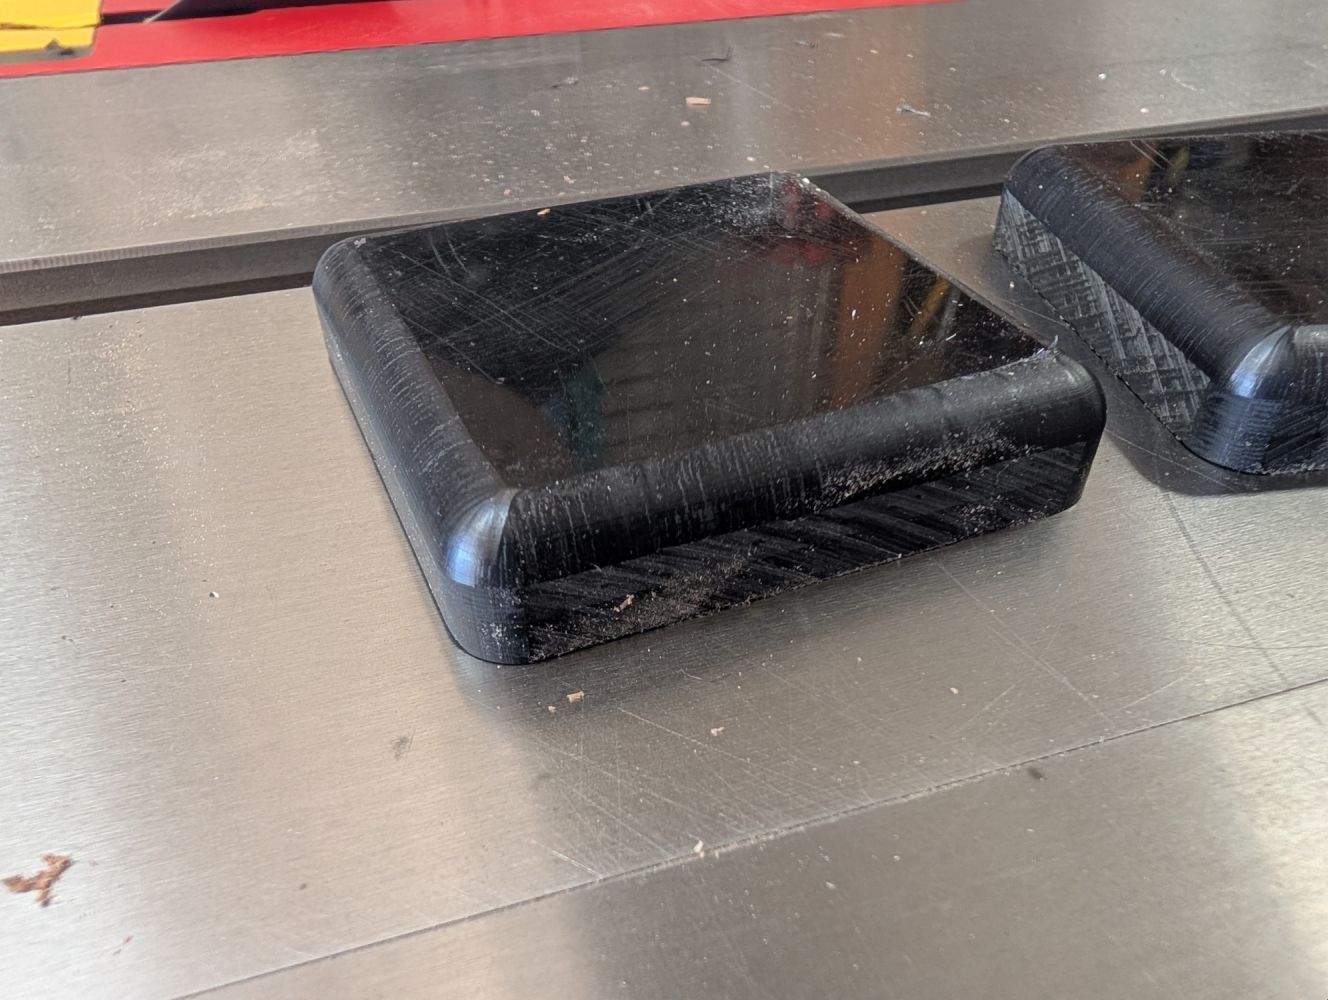
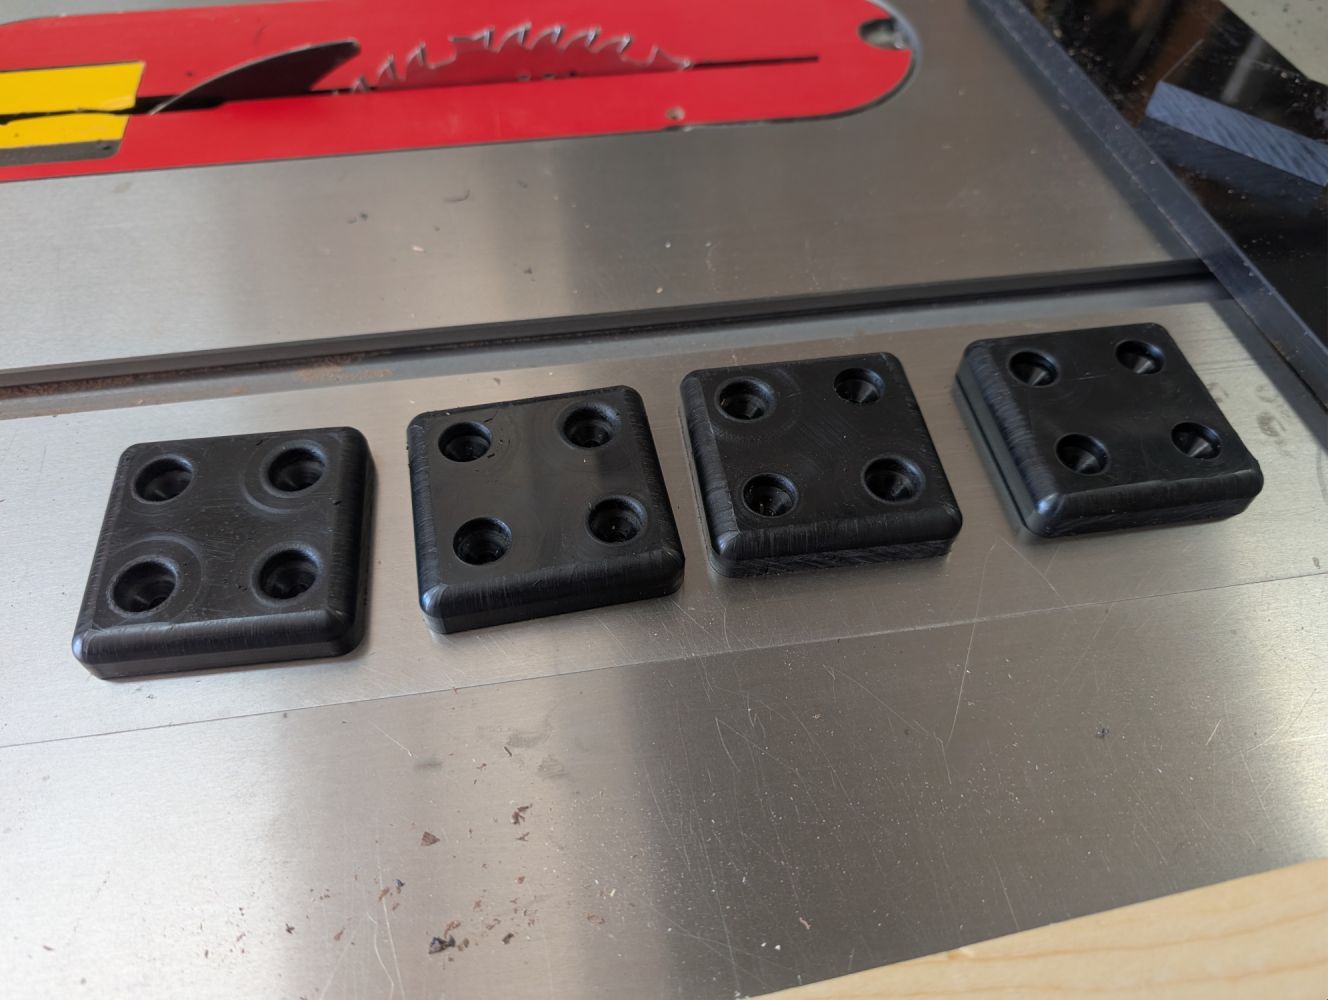
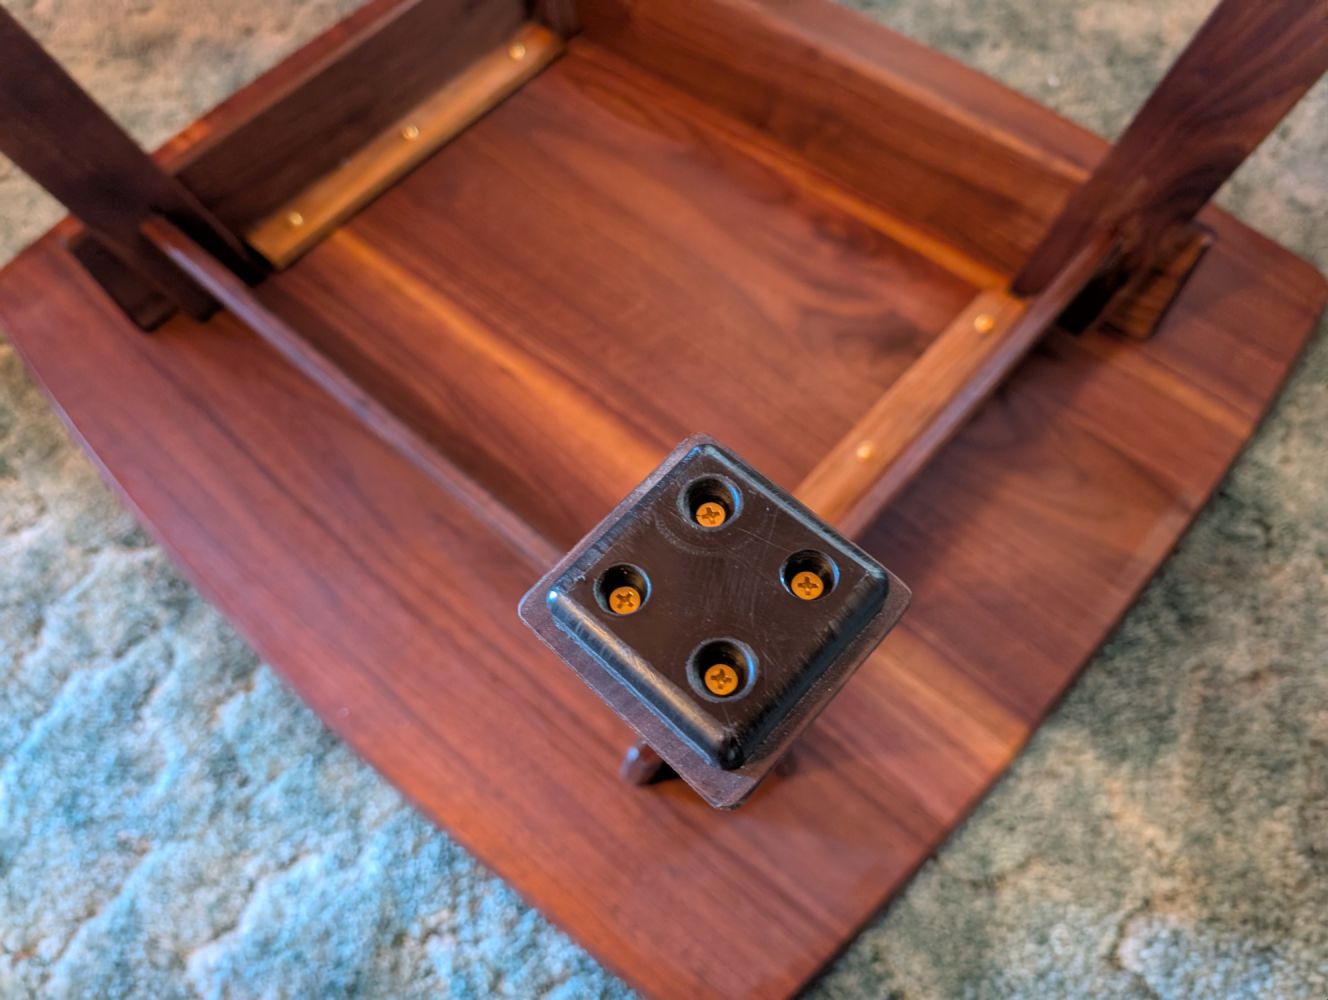
Since this will be sitting on a somewhat thick carpet, I made glides from 12mm UHMW to fit on the bottom of the legs.
Since this will be sitting on a somewhat thick carpet, I made glides from 12mm UHMW to fit on the bottom of the legs.
-
pxl 20250408.mp pxl 20250408.mp
Cutting and routing is really nice with this material.
Cutting and routing is really nice with this material.
-
pxl 20250408.mp pxl 20250408.mp
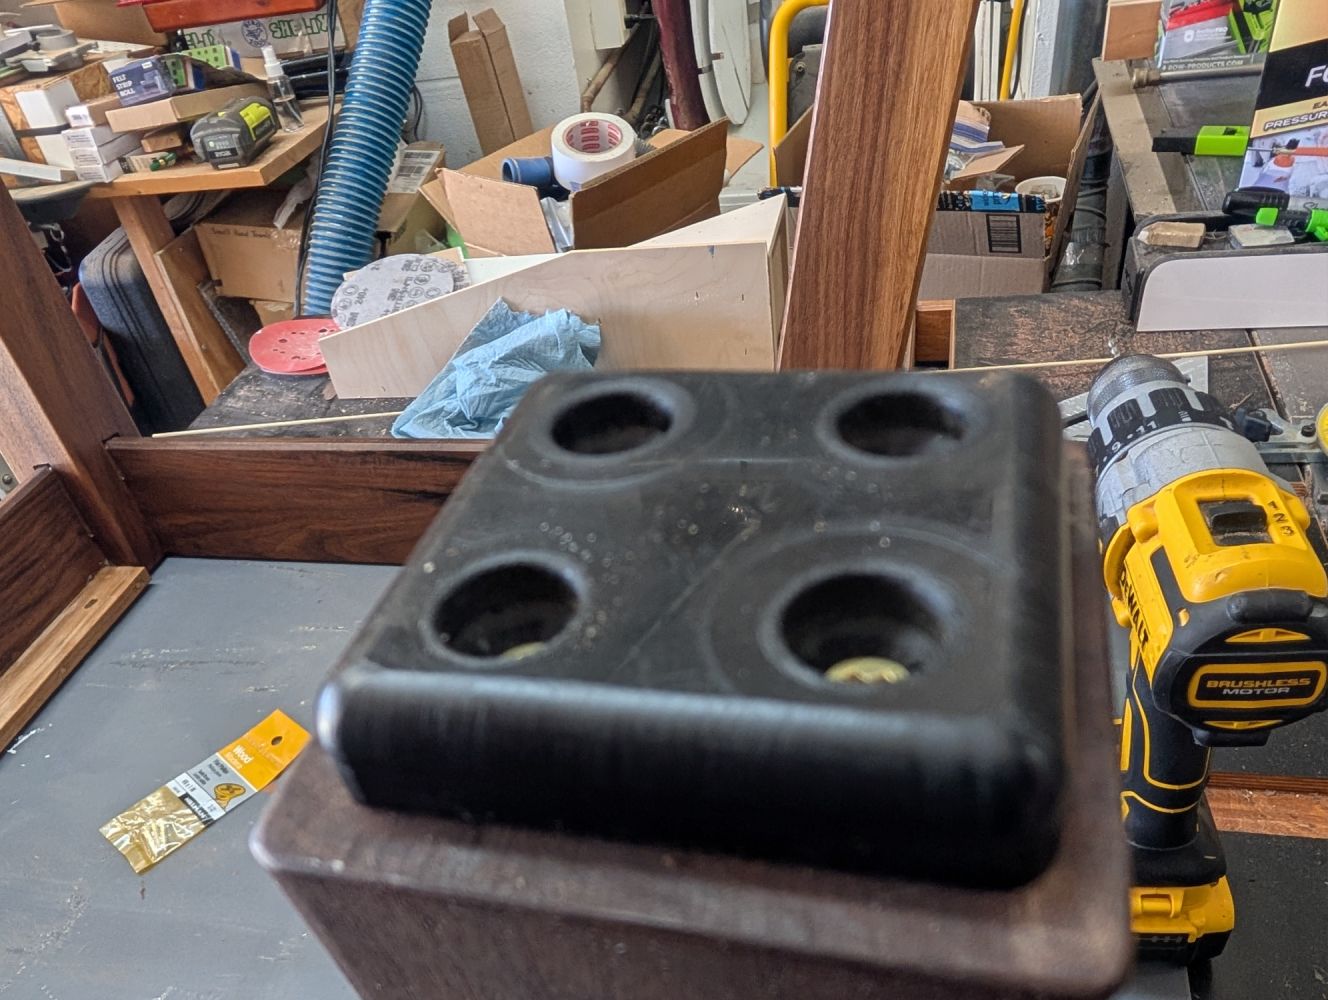
The only issue with machining this material is that in drilling the holes for the screws, it came off in long strands that wrapped around the drill bit.
The only issue with machining this material is that in drilling the holes for the screws, it came off in long strands that wrapped around the drill bit.
-
pxl 20250408.mp
pxl 20250408.mp
-
pxl 20250411.mp
pxl 20250411.mp
-
pxl 20250411.mp pxl 20250411.mp
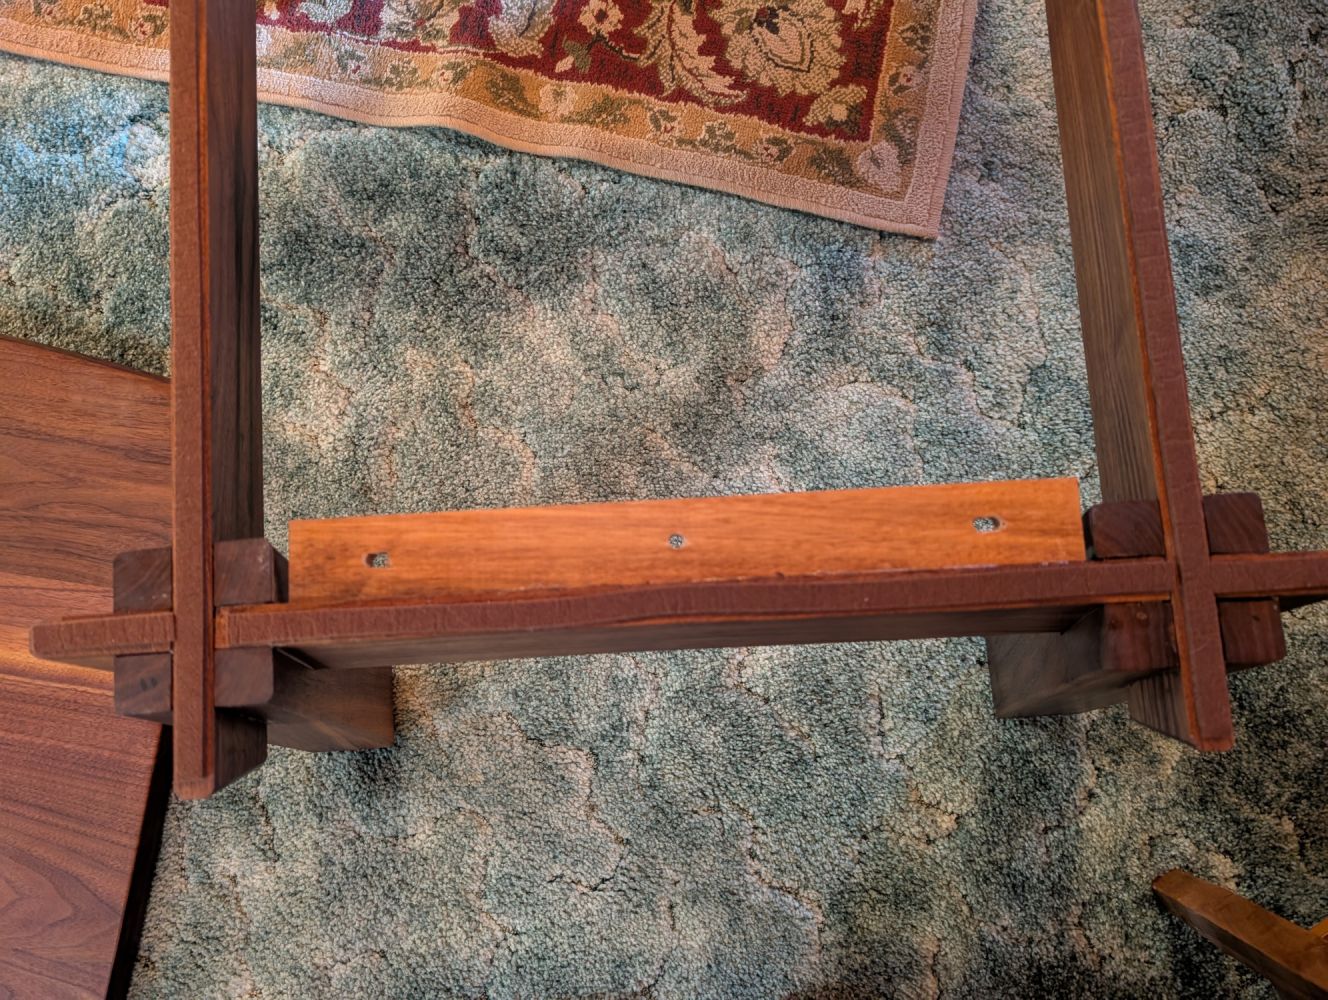
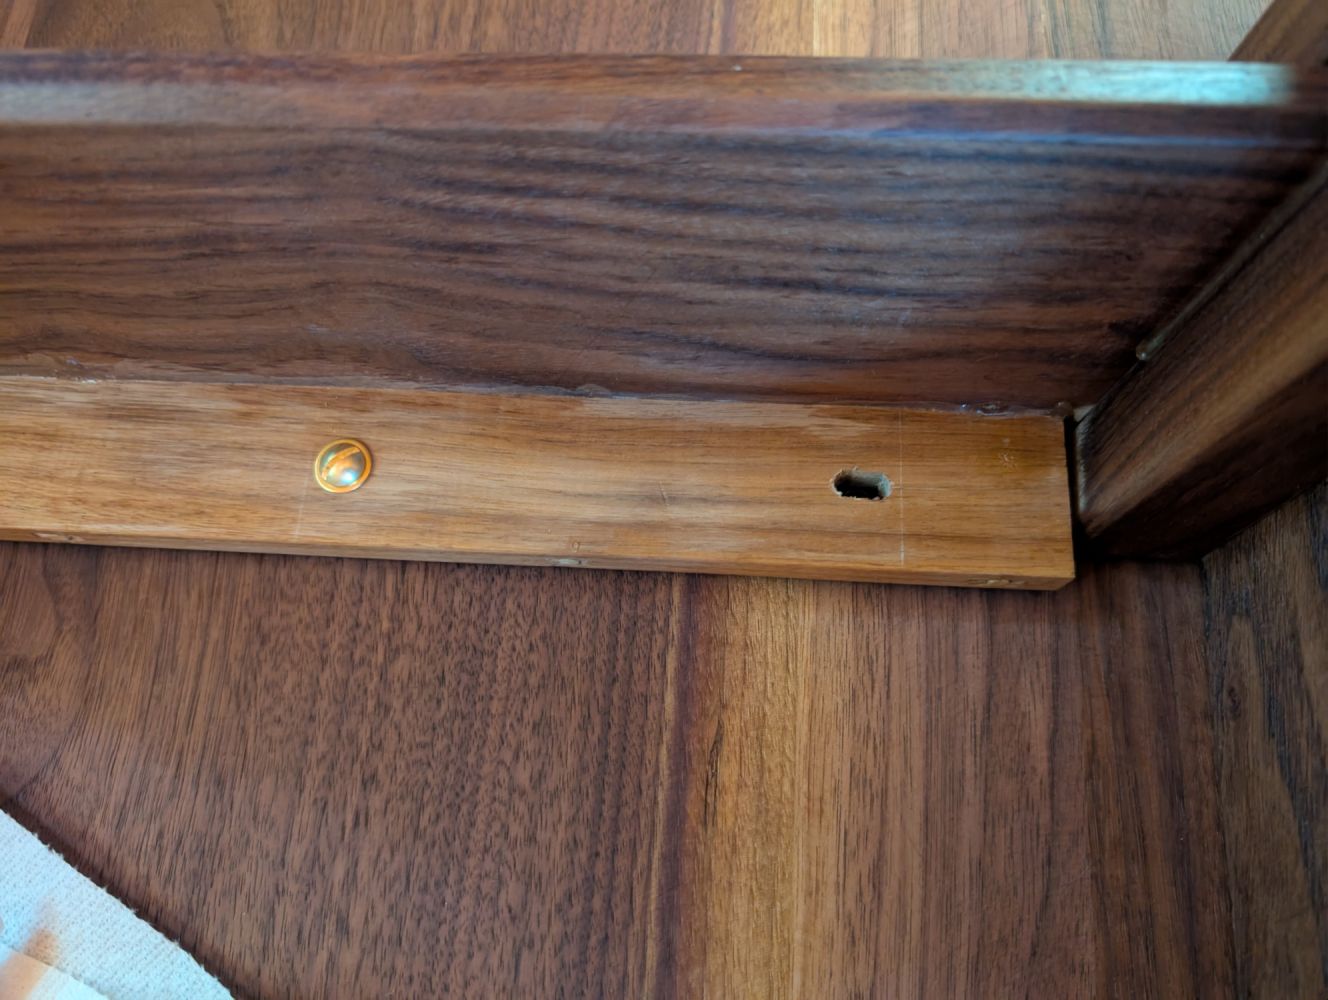
A view of the base's retainer strip for the top. The center hole doesn't allow movement to keep the top aligned while the two outer holes are elongated to allow some expansion/contraction of the width of the top.
A view of the base's retainer strip for the top. The center hole doesn't allow movement to keep the top aligned while the two outer holes are elongated to allow some expansion/contraction of the width of the top.
-
pxl 20250411.mp pxl 20250411.mp
Felt pads were added between the base and rails.
Felt pads were added between the base and rails.
-
pxl 20250411.mp pxl 20250411.mp
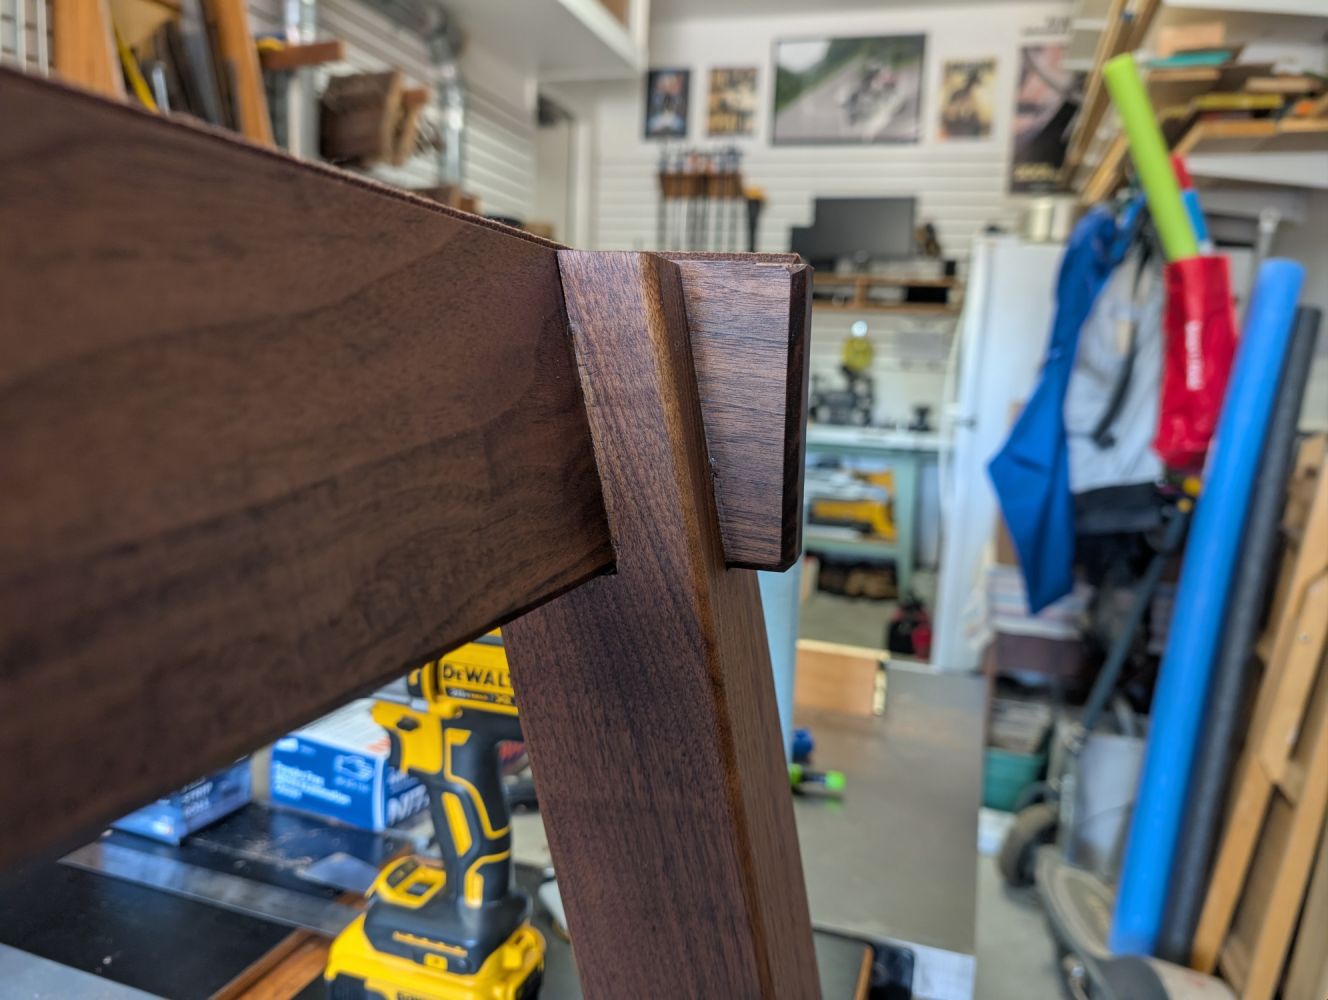
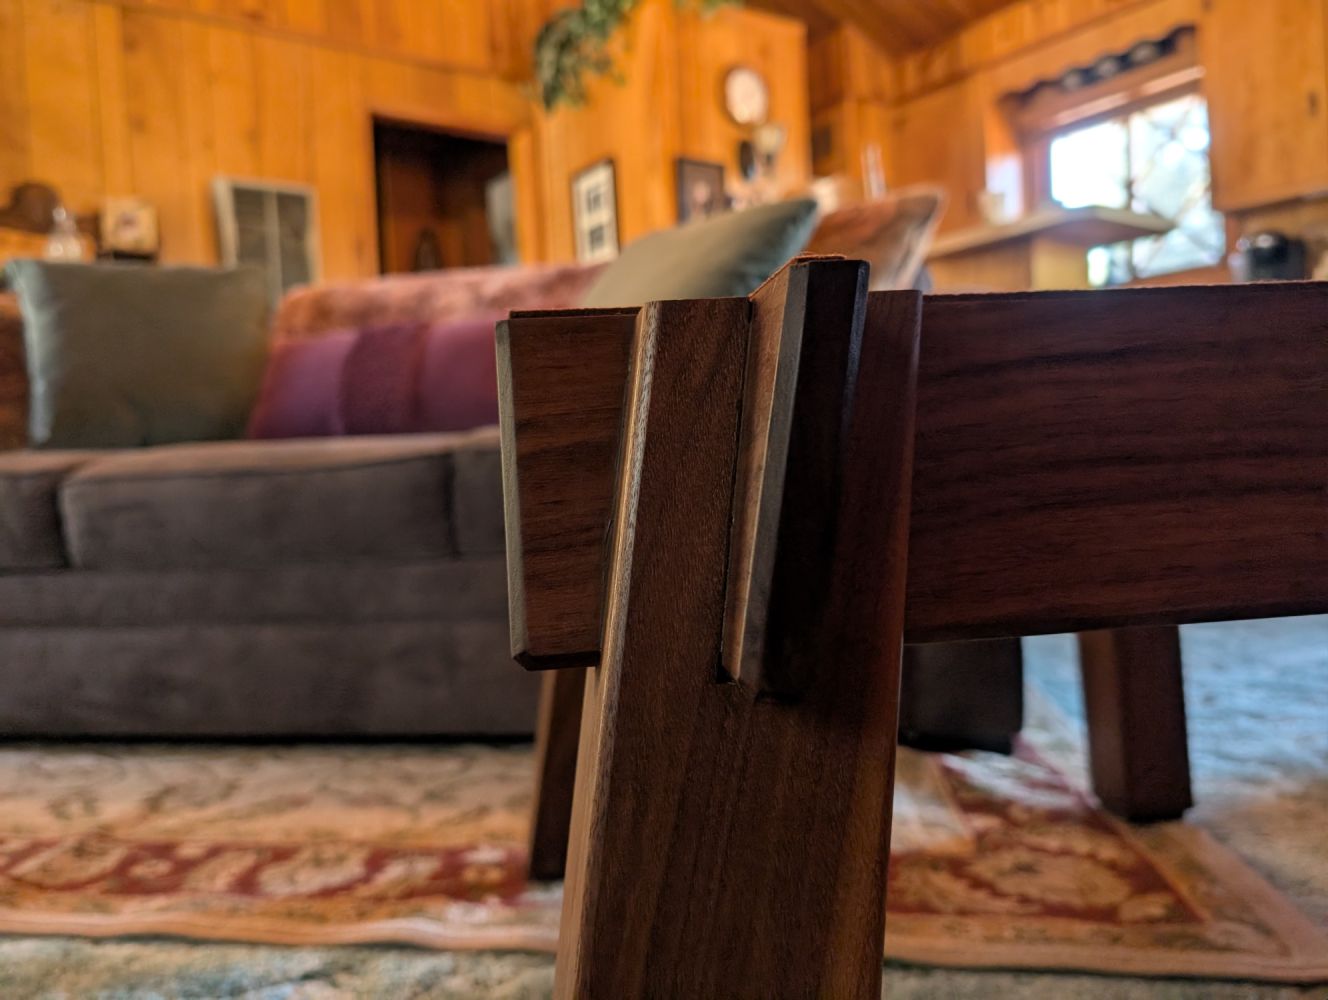
Just a view of the leg/rail joint.
Just a view of the leg/rail joint.
-
pxl 20250411.mp
pxl 20250411.mp
-
pxl 20250411.mp
pxl 20250411.mp
-
pxl 20250411.mp
pxl 20250411.mp
-
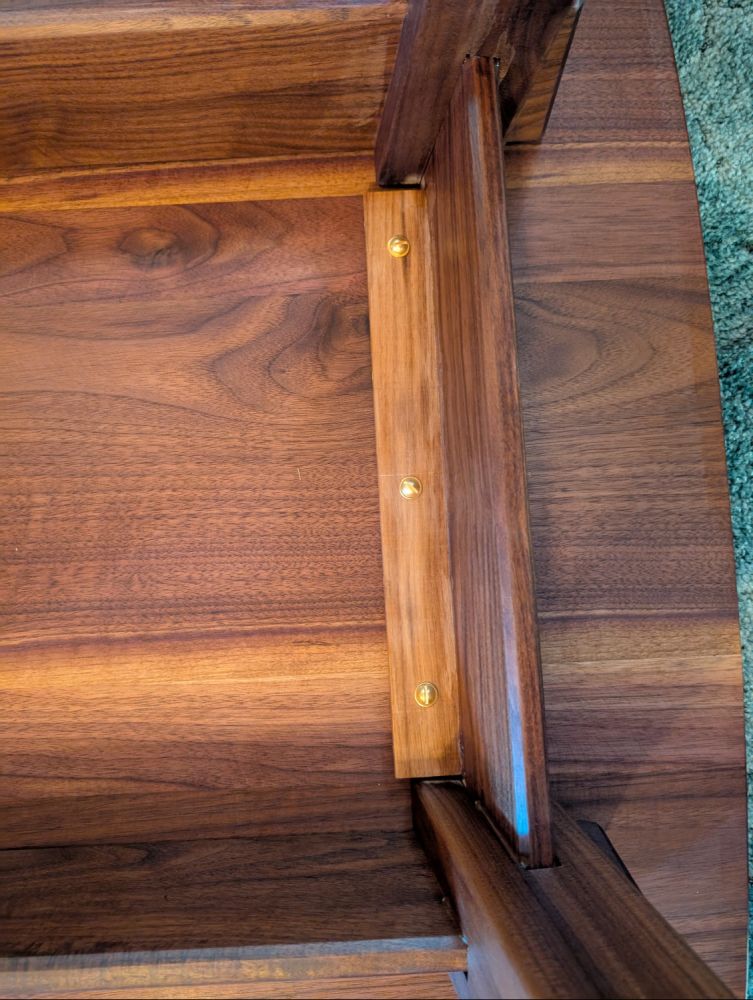
pxl 20250411.mp pxl 20250411.mp
Brass retention screws for the top to base connection.
Brass retention screws for the top to base connection.
-
pxl 20250411.mp
pxl 20250411.mp
-
pxl 20250411.mp
pxl 20250411.mp
-
pxl 20250412 pxl 20250412
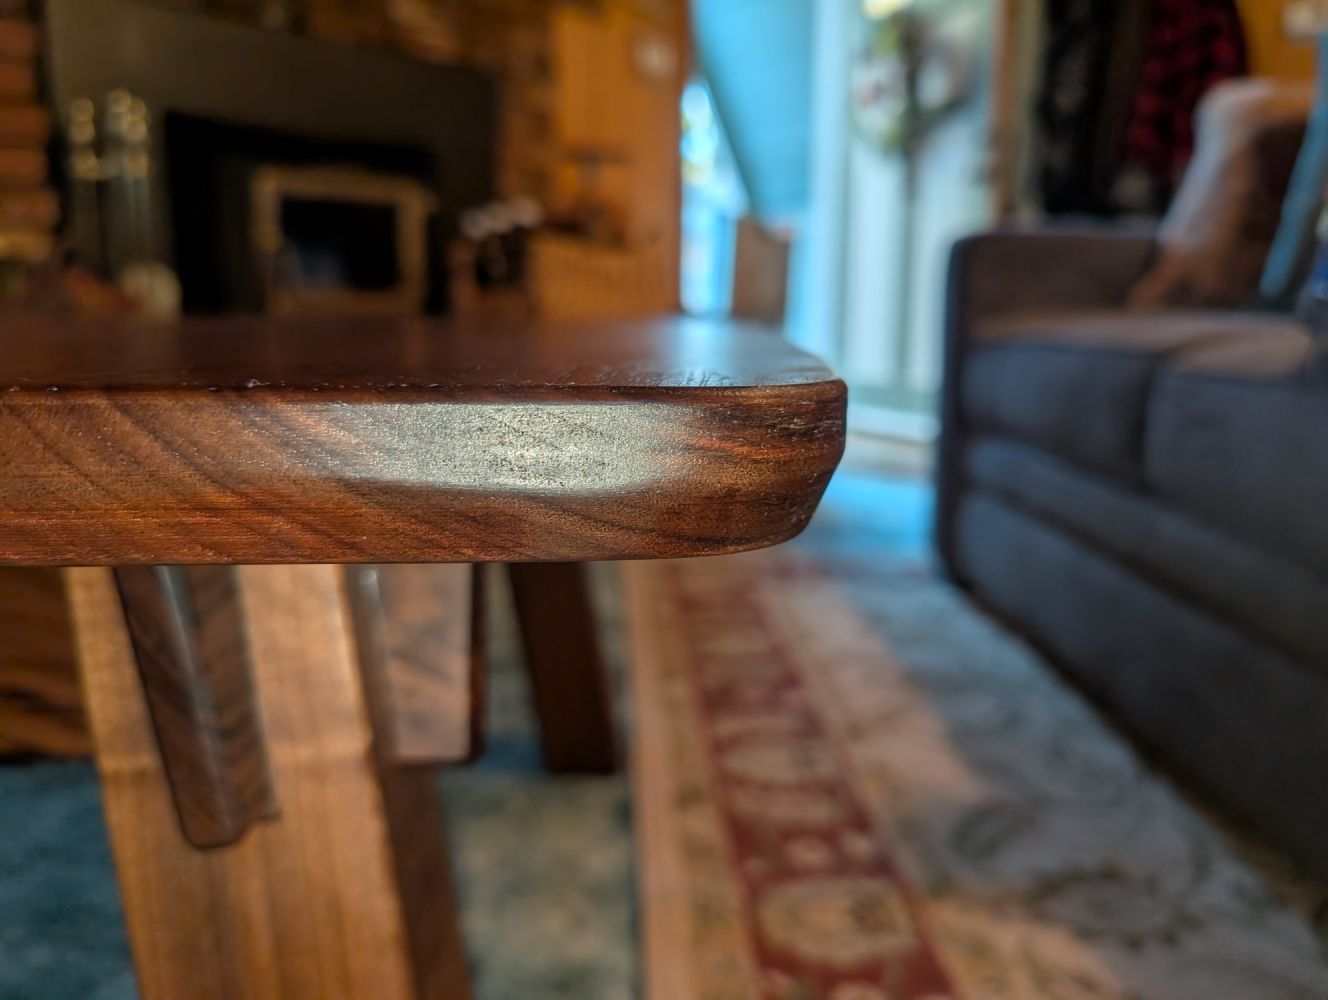
The edge's top has a 1/8" round over, while the bottom is a 15 degree bevel. Hand sanding was used to soften the transition between the vertical edge and the bevel, and the bevel and the bottom.
The edge's top has a 1/8" round over, while the bottom is a 15 degree bevel. Hand sanding was used to soften the transition between the vertical edge and the bevel, and the bevel and the bottom.


The finished coffee table is a bit of a stylistic mix: the top is a bit mid century modern while the legs are somewhat Greene & Greene. The build is solid walnut, finished in Rubio Monocoat Pure, and the top has an additional finish of Method Carbon's ceramic nano coat for additional protection. For this project, I didn't have any plans but just worked off the top of my head...

The first step was making a template for the top. I used some OSB to make a template for half the top. Using an aluminum straight edge with strings and clamps, I bent it to create a curve that was used for both the sides and ends, and a small can to round the corners. After drawing the lines, a saber saw was used to cut to the lines. Next was a belt sander to get down to the lines and finally hand sanding to smooth out the curves.

Just a quick shot of the lumber: 5/4, 4/4 walnut, along with some 3x3x18 walnut turning blanks.

The top was glued up in two sections. Liquid hide glue was used for this project.

Gluing up the two sections together. Dominoes were used for aligning the boards.

The template was used to draw a line, a saber saw to cut close to the line, and finally a router with a flush trim bit which followed the template to reach the final size of the table top. Some sanding smoothed out a few minor imperfections that I didn't notice in the template.

The top after the first application of Rubio Mono coat. I've found that on walnut, two or three applications are necessary.

Six steel inserts, three at each end, in the underside will secure the top to the bask. The center insert will mate to a standard size hole for its brass screw, while the two outer screws will fit into slots in case humidity changes cause and width changes in the top.

Since I was using slanted legs, with a castle joint, I made a quick jig to hold the legs while cutting the slots on a band saw.


Dry fitting the rails.

Dry fitting the legs.


Legs and rails now glued, and Rubio applied.


Just a view that helps to show the angle of the legs which is about 10 degrees.

Since this will be sitting on a somewhat thick carpet, I made glides from 12mm UHMW to fit on the bottom of the legs.

Cutting and routing is really nice with this material.

The only issue with machining this material is that in drilling the holes for the screws, it came off in long strands that wrapped around the drill bit.


A view of the base's retainer strip for the top. The center hole doesn't allow movement to keep the top aligned while the two outer holes are elongated to allow some expansion/contraction of the width of the top.

Felt pads were added between the base and rails.

Just a view of the leg/rail joint.


Brass retention screws for the top to base connection.


The edge's top has a 1/8" round over, while the bottom is a 15 degree bevel. Hand sanding was used to soften the transition between the vertical edge and the bevel, and the bevel and the bottom.


